Disclosure: topratedkitchenware.com is reader-supported. When you buy through links on our site, we may earn an affiliate commission from Amazon and other retailers, at no extra cost to you.
Where to buy
Read this first: none of the six ovens below is marketed or certified as a polymer clay oven — no such certification exists for countertop ovens. They are general countertop ovens whose verified size, controls, and heating style make them suitable candidates for a dedicated craft oven. Any oven used for polymer clay must stay dedicated to craft forever and never be used for food again. With that rule understood, here are the six candidates.
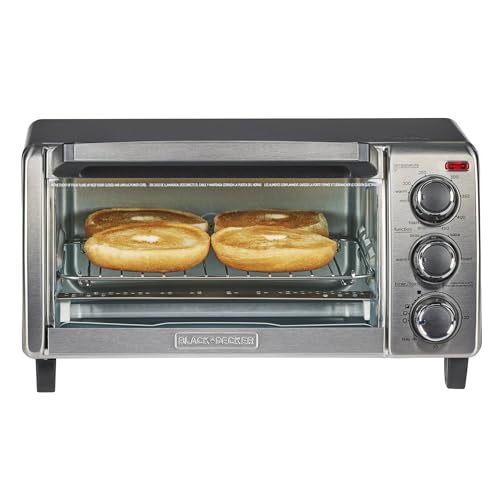
- BLACK+DECKER TO1313SBD Toaster Oven
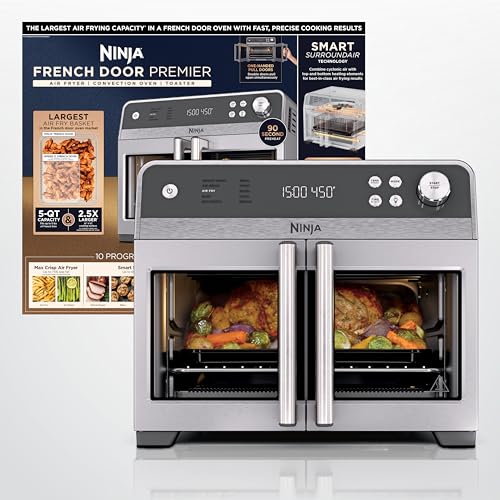
- Oster Extra-Large French Door Air Fryer Countertop Oven
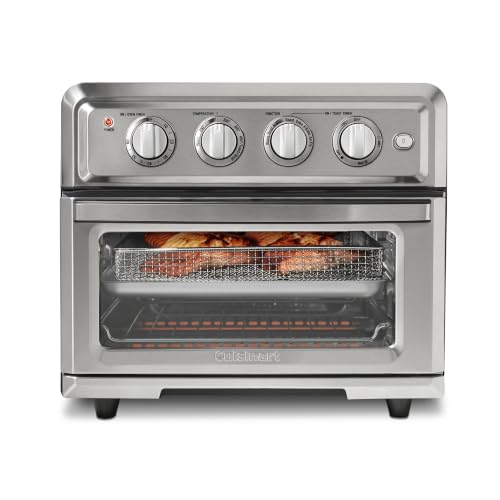
- Cuisinart Air Fryer Toaster Oven Combo TOA-55
- Emeril Lagasse 26QT French Door Air Fryer Toaster Oven
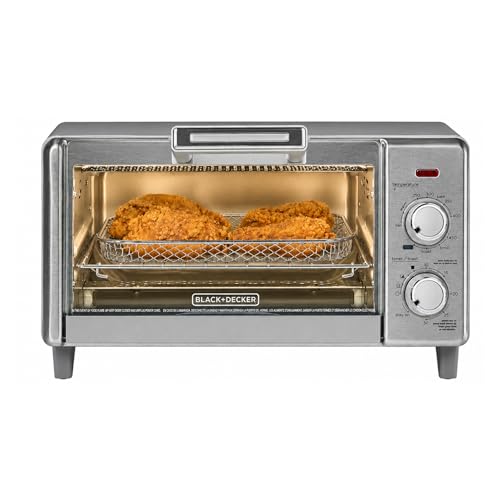
- BLACK+DECKER 4-Slice Air Fry Toaster Oven
- Ninja Digital Air Fry Countertop Oven SP101
Read the full guide ↓ for the thermometer rule, curing method, and safety practices that matter more than the oven itself.
Introduction: Finding the best toaster ovens for polymer clay
The best toaster ovens for polymer clay are not chosen the way food ovens are. Polymer clay cures at low temperatures — most brands specify a baking temperature in the region of 230°F to 275°F, held steadily for a sustained period — and it is unforgiving of temperature spikes, which can scorch or burn clay while a too-cool oven leaves pieces weak and under-cured. So the craft oven’s virtues are control, evenness, and stability at the low end of its range, plus a size matched to your work: beads and jewellery need very little room, while sculptures and doll work need height and depth. Every oven in this guide is a general countertop oven evaluated honestly against those craft criteria, using verified listing data only.
Two rules govern everything that follows. First, dedication: an oven that has cured polymer clay is a craft tool permanently, because clay residue and fumes have no place in food preparation; never cure clay in your kitchen’s food oven, and never return a clay oven to food use. Second, verification: toaster oven dials are notoriously approximate, so an independent oven thermometer inside the cavity is not an accessory but a requirement — you cure to the thermometer’s reading, not the dial’s. If your craft space is small, Best Toaster Ovens For Small Spaces covers footprint-first selection, and the same ovens’ food personalities appear in Best Toaster Ovens For Toast — for a different, food-dedicated unit, never the same physical oven.
Key Takeaways
- No countertop oven is certified for polymer clay; these are general ovens assessed for craft suitability, and honesty requires saying so.
- Dedicate the oven to clay permanently. Never cure clay in a food oven, and never cook food in a clay oven.
- An oven thermometer is mandatory: cure to the measured temperature, not the dial.
- Low-temperature steadiness matters more than maximum heat; convection can help evenness but must be verified with the thermometer.
- Compact ovens suit beads and jewellery; extra-large cavities suit sculptures and tall pieces.
- Ventilate the room, cure in a covered pan or tented foil to contain residue, and let pieces cool in the oven for strength.
In this guide
Quick Picks
| Pick | Badge | Standout trait from verified listing | Link |
|---|---|---|---|
| BLACK+DECKER TO1313SBD | Best Compact Dedicated Oven | Compact convection oven, timer, stay-on function, removable crumb tray | Check on Amazon |
| Oster Extra-Large French Door | Best for Large Sculptures | Fits 15 x 12 inch pans, French doors, auto-shutoff timer | Check on Amazon |
| Cuisinart TOA-55 | Best Control Headroom | 1800W, convection, max temperature 450°F, 0.6 cu. ft. | Check on Amazon |
| Emeril Lagasse 26QT French Door | Best Capacity | 26QT extra-large interior, 24 presets, six accessories included | Check on Amazon |
| BLACK+DECKER 4-Slice Air Fry | Best Small-Batch Dedication | 5-in-1, EvenToast technology, 9-inch pizza format | Check on Amazon |
| Ninja SP101 | Best Craft-Room Storage | 8-in-1, 1800W, flips up and away when not in use | Check on Amazon |
Even-browning discussions for food ovens translate partly to clay evenness; see Best Toaster Ovens For Toasting Bread Evenly for the heat-distribution background.
How These Picks Were Chosen
This is a research-led guide built from verified catalog data, not claimed hands-on testing, and for this topic the verification discipline matters doubly. Each pick was confirmed through Amazon’s Creators API on 2026-11-20. No listing in the pool claims polymer clay suitability, and this guide does not pretend otherwise: the picks were selected because their verified characteristics — cavity size in stated units, convection or digital control where listed, timer and shutoff features — map onto the real requirements of curing clay in a dedicated oven. Where a listing states a maximum temperature, we quote it as a specification of range, not as a recommendation to cure anywhere near it; clay work happens at the gentle end of these ovens’ abilities.
We spread the six across craft scales: two compact BLACK+DECKER models that are proportionate to dedicate to beads, jewellery, and small figures; a mid-size Cuisinart with convection and a stated temperature ceiling; an extra-large Oster and a 26-quart Emeril for sculptors whose work needs room; and the flip-up Ninja for craft rooms where the oven must disappear between sessions. Two standing rules apply: no static prices — check current figures through the links — and no fixed ratings or review counts, which change daily. The safety guidance in this article follows standard polymer clay practice: follow your clay manufacturer’s stated temperature and time, verify with a thermometer, and ventilate.
The 6 Best Toaster Ovens for Polymer Clay
BLACK+DECKER TO1313SBD Toaster Oven
Badge: Best Compact Dedicated Oven
Strengths
- Compact size is proportionate to dedicate permanently to craft
- Timer plus stay-on function suits long, low cures and slow cooling
- Removable crumb tray makes clearing clay dust and debris easy
Trade-offs
- Small cavity limits piece height — measure sculptures before committing
- Compact ovens can swing temperature more; thermometer verification is essential
- No digital temperature readout in its listed features
Mini spec box: Format: compact convection oven, 15.47 inch · Pizza fit: 9-inch · Controls: timer, stay-on function · Tray: removable crumb tray · Finish: Silver
For the majority of polymer clay work — beads, pendants, earrings, small figures, cane slices — a compact dedicated oven is the rational centre of the craft bench, and this BLACK+DECKER fits that role cleanly. Its modest cavity heats with little wasted space around small pieces, the stay-on function accommodates the long, gentle cures that thick pieces need, and the removable tray keeps the interior easy to clear of the dust and fragments that accumulate in craft use. The discipline this oven demands is the discipline every clay oven demands, only more so: small cavities respond quickly to the elements cycling on and off, so preheat longer than you think, confirm the true temperature with your thermometer across a full cycle, and consider a ceramic tile on the rack as a heat buffer — a widely used craft practice that steadies the temperature under your pieces. Label the oven “CRAFT ONLY” the day it arrives, and it will serve your jewellery bench for years.
Best for: bead, jewellery, and small-figure makers / Not suited for: tall sculptures

Oster Extra-Large French Door Air Fryer Countertop Oven
Badge: Best for Large Sculptures
Strengths
- Fits 15 x 12 inch pans — room for wide bases and large flat work
- French doors ease loading fragile, uncured pieces without tilting
- Auto-shutoff timer adds safety for long cures
Trade-offs
- Extra-large footprint needs a permanent craft-space home
- Large cavity takes longer to preheat and stabilise
- More oven than small-piece makers need
Mini spec box: Capacity: extra-large, fits 15 x 12 inch pans · Presets: 6 cooking presets · Timer: auto-shutoff · Doors: French doors
Sculptors work at a different scale, and scale is what the Oster offers. A cavity that accepts 15 x 12 inch pans accommodates wide sculpture bases, large tiles and plaques, and batches of components cured together, while the French doors solve a genuinely delicate problem: carrying an uncured, fragile piece on its tile or pan through a drop-down door invites tilts and touches, whereas side-opening doors let the work slide straight in at bench height. The auto-shutoff timer matters during long cures, giving a hard stop even if the maker is called away. Large cavities heat more slowly and can stratify — hotter near the top — so sculptors should map the interior with the thermometer at the actual height of the piece, cure on the middle position, and allow generous preheat time before the first piece of the day goes in. For big work, that patience is the price of even, complete curing.
Best for: sculptors and large-format clay work / Not suited for: small craft corners

Cuisinart Air Fryer Toaster Oven Combo, TOA-55
Badge: Best Control Headroom
Strengths
- Convection capability supports even heat distribution around pieces
- Stated 450°F maximum confirms a wide, controllable range — clay uses its low end
- 0.6 cu. ft. cavity suits mid-size work and batch curing
Trade-offs
- Powerful 1800W elements can overshoot if set carelessly — thermometer is mandatory
- Mid-size footprint needs a dedicated craft position
- Stainless finish shows clay dust and fingerprints
Mini spec box: Functions: 7-in-1 · Power: 1800W · Max temperature: 450°F (listing) · Capacity: 0.6 cu. ft. · Pizza fit: 12-inch · Tray: removable crumb tray · Finish: Stainless steel
The Cuisinart’s craft case rests on control and evenness. Convection moves air around pieces so that a tray of beads or a multi-part figure cures more uniformly than in still air, where the side nearest an element can run hotter. Its stated 450°F ceiling tells you the oven has a broad range with plenty of resolution at the low end where clay lives — you will operate far below that ceiling, at your clay manufacturer’s specified temperature, verified by thermometer. Treat the 1800W power with respect: strong elements cycle hard, so allow the oven to settle through several cycles during preheat before trusting the reading, and keep pieces centred and away from direct element proximity, tenting with foil as standard practice suggests. For makers who cure varied work — some jewellery, some mid-size sculpture — this is the balanced, capable middle choice. Its food talents are documented in Best Toaster Ovens For Toasting Bread, but remember: the physical unit you dedicate to clay never crosses back.
Best for: varied makers wanting convection evenness / Not suited for: anyone tempted to share it with food use
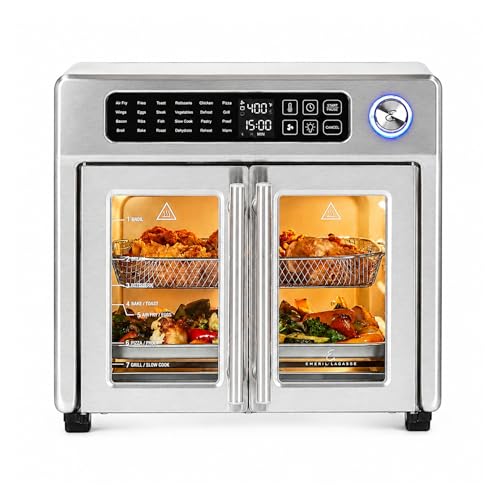
Emeril Lagasse 26QT French Door Multi-Function Air Fryer Toaster Oven
Badge: Best Capacity
Strengths
- 26QT extra-large interior for the biggest craft projects in this guide
- French doors for careful, level loading of fragile work
- Six accessories included per the listing — pans and racks for varied setups
Trade-offs
- Very large footprint; a studio decision, not a kitchen-corner one
- 24 presets are food-oriented; clay work uses manual time and temperature
- Long preheat to stabilise a big cavity
Mini spec box: Capacity: 26QT, extra-large interior · Presets: 24 one-touch options · Accessories: six included · Doors: French door · Format: Countertop convection cooker
Doll makers, large-scale sculptors, and teachers curing a class’s worth of pieces at once are the audience for the Emeril 26QT. Its extra-large interior swallows tall work that compact ovens cannot attempt, and the included accessories give you racks and pans to arrange multi-level or multi-piece cures. Ignore the food presets entirely; your tools are manual temperature, a timer, and the thermometer, mapped at the height where your tallest piece will sit. Big cavities reward batch discipline: cure similar thicknesses together, because a batch of thin beads and one thick sculpture in the same run will finish at different times and tempt you to open the door repeatedly — each opening drops the temperature and restarts the oven’s climb, unevenly. Plan batches by thickness, preheat generously, and this oven becomes a small studio kiln-room of its own, at clay temperatures and with clay rules.
Best for: large sculpture, dolls, and teaching batches / Not suited for: small studios or occasional small pieces
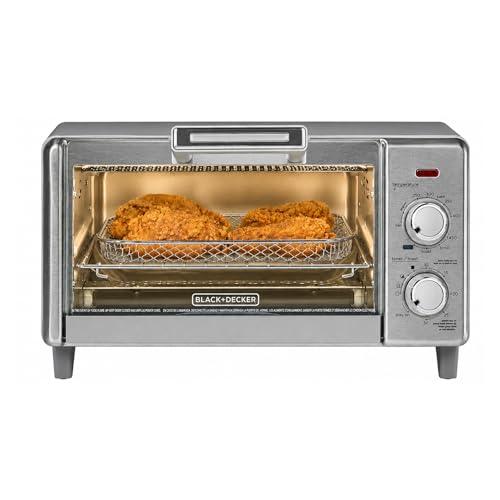
BLACK+DECKER 4-Slice Air Fry Toaster Oven
Badge: Best Small-Batch Dedication
Strengths
- Small 4-slice format is easy to dedicate and easy to house
- 5-in-1 set includes bake and keep warm for flexible craft routines
- EvenToast technology reflects a design focus on even heat
Trade-offs
- 9-inch pizza format signals a small cavity — jewellery scale, not sculpture
- Air fry fan modes are not needed for clay; use gentle bake settings
- Temperature must be thermometer-verified like every pick here
Mini spec box: Functions: air fry, bake, broil, toast, keep warm (5-in-1) · Capacity: 4-slice · Pizza fit: 9-inch · Technology: EvenToast
If your clay work is earrings, beads, charms, and miniature food for dollhouses, this little BLACK+DECKER may be the most sensible dedication of all: small enough to live permanently on the craft bench, quick to preheat, and modest in every dimension. Use its bake function for curing and ignore the air fry mode, whose aggressive fan and heat are designed for crisping food, not for the gentle stability clay wants. The keep warm setting tempts some makers as a low-temperature option, but do not improvise curing temperatures from mode names — set the temperature your clay specifies, verify it on the thermometer, and hold it for the full stated time. At miniature scale, pieces cure quickly and evenly, and a compact oven’s modest cavity is an advantage rather than a compromise. As ever, the dedication rule is absolute from the first cure onward.
Best for: miniature and jewellery specialists / Not suited for: anything tall or wide

Ninja Digital Air Fry Countertop Oven, SP101
Badge: Best Craft-Room Storage
Strengths
- Flips up and away, returning craft-bench space between sessions
- Digital controls support repeatable settings
- Wide, low cavity suits tiles, plaques, and flat work
Trade-offs
- Low interior height excludes tall sculptures
- Must cool fully before flipping up for storage
- Digital precision is displayed precision — still verify with a thermometer
Mini spec box: Functions: air fry, air roast, broil, bake, toast, bagel, dehydrate, keep warm (8-in-1) · Power: 1800W · Format: XL, flip up and away · Finish: Silver
Craft rooms are chronically short of surface, and the SP101 is the only oven here that gives its surface back: after a session, once fully cool, it flips up against the wall and the bench is yours again. Its wide, low cavity is a natural match for flat clay work — tiles, coasters, plaques, veneer sheets, and trays of beads — while its digital controls make returning to a verified setting straightforward from session to session. Keep two cautions in view. The low height is a hard limit for sculptural work; measure your tallest intended piece before choosing it. And a digital display shows the oven’s target, not the cavity’s truth — the thermometer rule applies here with the same force as on the simplest dial oven. Used within those limits, it is the most liveable craft oven in the guide for a multi-purpose room. Frozen-food makers eyeing the same model for a separate food unit can compare notes in Best Toaster Ovens Frozen Pizza.
Best for: flat work in shared craft rooms / Not suited for: tall sculpture
Comparison Table
| Model | Craft-relevant trait | Scale | Link |
|---|---|---|---|
| BLACK+DECKER TO1313SBD | Timer + stay-on, removable tray | Compact | Check on Amazon |
| Oster Extra-Large | Fits 15 x 12 inch pans, French doors | Extra-large | Check on Amazon |
| Cuisinart TOA-55 | Convection, 450°F max stated, 0.6 cu. ft. | Mid-size | Check on Amazon |
| Emeril 26QT | 26QT interior, six accessories | Extra-large | Check on Amazon |
| BLACK+DECKER 4-Slice | 5-in-1, compact dedication | Small | Check on Amazon |
| Ninja SP101 | Digital controls, flip-up storage | Wide, low | Check on Amazon |
How to Choose a Toaster Oven for Polymer Clay
Choose by your largest typical piece, not your smallest. Measure the height of your tallest sculpture style or the footprint of your widest tile work, then match it against the cavity descriptions in this guide with margin on every side — clay should never sit close to an element, and air needs room to circulate for even curing. Jewellery and bead makers should favour the compact picks: they are easier to dedicate, faster to stabilise, and cheaper in space. Sculptors should favour the Oster or Emeril and accept their longer preheats as the cost of scale.
Next, value control features that serve low-temperature work: a timer you trust, an auto-shutoff for safety, digital settings if you want repeatability, and convection if you cure multi-piece batches and want evenness — always verified by thermometer, because no control type exempts you. Ignore maximum temperature as a headline; you will live at the bottom of the range. Finally, plan the dedication honestly: the oven needs a permanent craft home with ventilation, clearance from papers and solvents, and a label. If you cannot give an oven that home, postpone the purchase rather than sharing a food oven “just this once” — that single compromise is the one this craft does not forgive.
How to Cure Polymer Clay in a Toaster Oven: Step by Step
First, set up safely: oven on a stable, heat-safe surface with clearance, room ventilated, thermometer placed inside at the height your pieces will occupy, and a ceramic tile or a pan lined for curing on. Second, preheat to your clay manufacturer’s specified temperature — commonly in the 230°F to 275°F region depending on brand — and wait until the thermometer holds that temperature steadily through several element cycles, not merely touches it once. Third, load pieces centred on the tile or pan, spaced so they do not touch, and tent loosely with foil or cover with an inverted pan if you use that standard practice to shield pieces from direct element heat and contain residue. Fourth, cure for the full time the manufacturer states for your piece’s thickness — under-curing is the main cause of weak, breakable work, and thicker pieces need proportionally longer, never hotter. Fifth, switch off and let pieces cool slowly inside the closed oven; clay gains strength as it cools, and removing hot pieces invites cracks and fingerprints. Sixth, record the session: clay brand, thickness, temperature as measured, time, and result. That log becomes your personal curing chart.
Troubleshooting follows the pattern. Problem: pieces scorch or darken → the true temperature spiked above the dial setting; verify with the thermometer, tent with foil, and move pieces further from elements. Problem: pieces are brittle and snap → they were under-cured; extend the time at the correct temperature rather than raising the heat. Problem: cracks appear after cooling → the piece cooled too fast or was cured unevenly; cool in the closed oven and check for hot spots with a test tile of scrap clay. Problem: shiny spots or plaquing on the surface → the clay touched a smooth surface while hot or overheated locally; cure on paper or a tile and re-check temperature accuracy.
Temperature Truth: Why the Thermometer Runs Your Craft
Toaster ovens are built for food, where a twenty-degree error changes little. Polymer clay lives in a narrower band, where the same error can mean the difference between a strong cure and a scorched or fragile piece. Dials are approximate, digital displays report targets, and elements cycle — the cavity temperature swings around the set point as the oven heats and rests. An oven thermometer, watched across a full preheat and a mock cycle, shows you the swing: its average, its peaks, and how long stability takes. Some makers add thermal mass — a ceramic tile or pizza stone kept in the oven — to damp the swing, and many map their oven once, noting which rack position runs truest. Do this calibration once, write it down, and every future cure starts from knowledge instead of hope. This is the least expensive, most consequential practice in the entire craft, and it applies identically to every oven in this guide, from the simplest compact model to the largest digital one.
Clay Brands, Thickness, and Curing Schedules
Different polymer clay brands specify different curing temperatures, and some are blended for softness, strength, or translucency — always follow the package for the clay in your hands rather than a generic number from memory. The universal variable is thickness: curing time scales with the thickest part of the piece, and experienced makers cure in stages for complex work, adding fresh clay to cured foundations and curing again, since polymer clay can be re-cured safely at its proper temperature. Armatures — foil cores, wire, heat-safe fillers — reduce thickness in large sculptures, saving material and making curing more even; a solid, very thick sculpture is the hardest cure in the craft and the strongest argument for the larger ovens here. Keep scrap-clay test pieces in every unfamiliar batch: cure a measured cube alongside your work, then test its strength after cooling. If the test cube snaps easily, the batch needs more time — knowledge you gain without sacrificing the piece itself.
Common Buying Mistakes
The gravest mistake is curing clay in the family food oven “temporarily” — dedication delayed is dedication denied. Second is trusting the dial and skipping the thermometer, then blaming the clay for scorching or brittleness. Third is buying a huge oven for bead work, then fighting its slow stabilisation for years, or a tiny oven for sculpture and discovering the height limit mid-project. Fourth is chasing high maximum temperatures, which are irrelevant to a craft that lives at gentle heat. Fifth is forgetting ventilation and workspace planning: the oven is one purchase inside a small system that includes a thermometer, tiles or pans, and a safe, permanent position.
Final Recommendation
For most makers, the BLACK+DECKER TO1313SBD is the right dedication: compact, timer-equipped, and proportionate to jewellery and small work. Sculptors should step up to the Oster Extra-Large for its pan capacity and French doors. Makers wanting convection evenness for varied batches should choose the Cuisinart TOA-55. Whichever you choose, buy the thermometer with it, label the oven for craft only, and cure to the measured temperature — that discipline, not the badge on the door, is what makes strong, lasting clay work.
Conditioning and Preparing Clay: The Work Before the Oven
The oven gets the blame for many failures that begin at the conditioning stage. Polymer clay must be conditioned — kneaded or rolled until pliable and uniform — before shaping; under-conditioned clay traps air, and trapped air expands during curing into bubbles, blisters, and the cratered surface defect makers call mooning. Condition until the clay is smooth and flexible, roll sheets on the thickest pasta-machine or roller setting first and fold deliberately to expel air rather than randomly, and avoid whipping air into soft clay with fast, careless rolling. Warm, stiff clay responds to the heat of your hands and patient working; additives and softeners exist for very firm blocks, used sparingly, since over-softened clay distorts fine detail and fingerprints everything it touches.
Work surfaces matter to the cure as well. Cure pieces on the surface they will keep their shape on — a ceramic tile is the classic because it is flat, heat-stable, and doubles as a carrying board from bench to oven, so fragile pieces are never handled uncured. Baking paper on a tile prevents the shiny contact patches that smooth surfaces can leave on clay and makes release effortless. Keep raw clay colours separated in storage, lint and dust are the enemies of pale clay in particular, and wash hands between colours if you want your whites to stay white. None of this is oven technology, but all of it decides what the oven is given to work with — and a good cure cannot rescue a poorly prepared piece.
Techniques That Test an Oven: Canes, Mokume Gane, and Transfers
Certain techniques expose an oven’s evenness more than others. Long canes, sliced into dozens of identical beads or veneer pieces, cure in batches where a hot spot reveals itself as a gradient of colour or strength across the tray — one reason batch makers map their ovens with test tiles before committing a cane they spent hours building. Mokume gane stacks and other layered constructions cure as slabs whose thickness is uniform by design, making them excellent early projects for a new oven: if a uniform slab cures unevenly, the oven, not the technique, needs attention. Image transfers and decal work are surface-sensitive; overheating clouds them, so these pieces argue for the most careful thermometer work and for tenting, which softens the direct radiant blast from elements.
Liquid clay applications, used as adhesive, glaze, or in moulds, cure by the same temperature rules but show under-curing as cloudiness or tackiness — extend time at temperature rather than raising heat. Mixed-media pieces that combine clay with glass gems, metal findings, or heat-safe stones should be checked component by component: everything in the oven must tolerate the curing temperature for the full duration, and findings are usually added after curing with adhesive when there is any doubt. The pattern across all techniques is identical — know your material’s specification, verify your oven’s truth, and let the log you keep turn other makers’ folklore into your own measured practice.
Finishing Cured Work: Sanding, Buffing, and Surface Choices
What happens after cooling decides whether cured work looks homemade or handmade. Wet-sanding with fine, progressively finer abrasives smooths fingerprints and seams without scratching, and the water keeps clay dust down — an important hygiene point, since cured clay dust should not be breathed or spread around food areas; sand at the craft bench, not the kitchen table, which is another quiet argument for the dedicated craft setup this guide recommends. Buffing on a soft wheel or by hand with a cloth brings a natural sheen to sanded pieces without any coating. Glazes and varnishes formulated for polymer clay can add gloss or protect surface treatments like mica powders and pastels, but they are optional chemistry — many makers prefer the sanded-and-buffed finish precisely because it cannot peel, yellow, or react with the clay over time.
Store finished pieces away from other plastics, since polymer clay can react with some plastic surfaces in prolonged contact, and keep them out of prolonged harsh sunlight as you would any coloured artwork. Jewellery findings should be attached with mechanical connections or appropriate adhesives after curing, and pieces intended for children should be made generously thick at their weak points — a well-cured, sensibly designed piece is sturdy, but thin, under-cured extremities are where breakage lives. Finishing is where the oven’s good work becomes visible: a fully cured, patiently cooled piece sands cleanly and buffs beautifully, while an under-cured one gums abrasives and resists polish — one final, tactile proof of why the thermometer discipline matters.
Setting Up a Safe, Permanent Clay Station
The oven should be the anchor of a small, deliberate station rather than a traveller between rooms. Choose a position with ventilation — near a window or where air moves — on a stable, heat-resistant surface, with the manufacturer’s clearance respected and no paper, fabric, or solvent bottles within reach of its vents. Keep the thermometer, tiles, baking paper, foil for tenting, and your curing log in a single tray or box at the station, so every session begins equipped and no one improvises substitutes mid-cure. A surge-protected outlet and a timer you can hear from the next room complete the setup. Label the oven plainly — a strip of tape reading “POLYMER CLAY ONLY — NO FOOD” prevents the one mistake a shared household could make, a well-meaning relative warming a snack in the wrong oven.
If children craft with you, the station rules are simple and absolute: adults run the oven, children do the shaping, and cured pieces are handled only after cooling. Polymer clay itself is widely used in schools and homes, and the craft’s safety culture rests on exactly these habits — correct temperatures, ventilation, hand-washing after handling raw clay, and the food/craft separation this guide has repeated because it is the rule that protects everything else. Set the station up once, properly, and the hobby becomes a pleasure with a clear conscience.
From First Cure to Confident Practice: A Four-Week Path
Week one is calibration: thermometer in, temperature mapped, scrap-clay test tiles cured at the manufacturer’s specification and strength-tested after cooling. Week two is simple, forgiving work — beads, pendants, flat pieces — cured in small batches while your log grows. Week three adds one new variable: thicker pieces, a layered technique, or a multi-piece batch, changed one at a time so results stay interpretable. Week four is your first real project, cured with the confidence of three weeks of notes behind it. This path sounds slow and is actually the fastest route to reliable work, because every alternative involves ruining finished pieces and guessing why. Makers who follow it typically discover their oven’s personality — its true temperature offset, its best rack position, its settling time — within the first fortnight, and that knowledge transfers to every future project and every future clay brand.
Keep the log even after confidence arrives. New clay colours occasionally behave differently, very thick work always deserves a test cube, and seasons change room temperature enough to matter at the margins. The log is the difference between a craftsperson and a hobbyist who got lucky — and it costs a pencil.
When Clay Burns: Recognising and Recovering From Overheating
Burned polymer clay announces itself with a sharp, unpleasant smell, darkening or browning of the surface — pale colours show it first — and, in serious cases, bubbling. If it happens, switch the oven off, ventilate the room well, and let everything cool before handling; the piece is lost, but the lesson is valuable and the oven is not, provided you clean it and recalibrate before the next cure. The cause is almost always a temperature spike: a dial trusted blindly, a piece placed too close to an element, or a small oven whose cycling overshoots at the start. The recoveries are the practices this guide has built in layers — thermometer verification across a full cycle, tenting, centred placement, thermal mass from a tile, and a preheat long enough for the oven’s swing to settle into its rhythm rather than its initial surge.
Treat your first burn, if it comes, as tuition rather than failure. Every experienced maker has a scorched test tile in their history; the ones who kept going are those who converted the accident into a calibration session. Note the conditions in your log, adjust one variable, and cure a scrap tile to prove the fix. The craft rewards this temperament — measured, observant, unhurried — more than it rewards any equipment upgrade, including every oven on this page.
A closing thought on proportion: the oven is the most expensive item in a polymer clay setup and, once calibrated, the least interesting — which is exactly right. The craft’s joys are colour, form, and technique, and a dedicated, understood oven quietly removes itself from your attention so those joys can have it. Choose the size that matches your work from the six above, set up the station with care, and let the thermometer stand guard. Your future pieces — strong, evenly cured, finished with pride — are the review that matters.
Buying the Supporting Kit: Thermometer, Tiles, and Tools
Budget attention for the supporting kit when you choose the oven, because the kit is what makes any of these ovens a clay oven in practice. The oven thermometer comes first and is non-negotiable — choose one that reads clearly through the door glass and sits or hangs stably at piece height. Ceramic tiles in a size matched to your oven come next; buy several, so one can cool with finished work while another loads. Baking paper, foil for tenting, and an inverted spare pan for covering larger pieces complete the curing kit. Beyond it: a smooth work surface that releases clay, basic shaping tools, a roller or pasta machine for sheet work, and storage boxes that keep colours clean and separated. None of this needs to be bought at once or at premium levels; makers accumulate tools as techniques demand them. But the thermometer and tiles belong in the first order, alongside the oven itself — curing without them is guessing, and this craft punishes guessing with a consistency that borders on the personal.
One more kit habit: keep a dedicated set of clay-only basics — the tile, the paper, the foil, even a pair of oven mitts marked for the craft station — so nothing migrates between the clay bench and the kitchen. The separation this guide insists on is easiest to keep when it is physical and visible, built into objects rather than remembered under pressure. Systems beat intentions, in clay as in cooking.
A Word on Second-Hand and Shared-Space Ovens
Some makers acquire a second-hand toaster oven for clay, which can be a sensible economy — with two checks. First, confirm the oven heats evenly enough for the work by running the full thermometer mapping before trusting it with real pieces; an oven retired for uneven food cooking may still serve thin, forgiving work, but you should know its character rather than discover it on a finished sculpture. Second, clean it thoroughly before dedication and accept that its history is food — which is fine, because dedication is a one-way door pointing forward: once it cures clay, it never cooks again. In shared studios and classrooms, put the dedication label and the basic curing chart on the oven itself, so every user follows the same temperature discipline and no newcomer “helpfully” returns it to snack duty. Shared equipment survives on written rules, kindly enforced.
Whether new or second-hand, expensive or modest, the oven that serves your craft best is the one whose temperature you have measured and whose limits you respect. Everything in this guide — the picks, the method, the safety rules — reduces to that sentence. Honour it, and polymer clay becomes one of the most satisfying, repeatable crafts a home studio can host.
Start with scrap, start with notes, and start today — the first test tile takes minutes and teaches more than another hour of reading, including this guide.
Keep that first test tile, dated, on a shelf near the station. Months later it will remind you how far your calibration has come — and if a future cure ever puzzles you, it is the baseline you can re-test against, proof that method, patiently kept, beats memory every time.
Frequently Asked Questions
Can I cure polymer clay in the same oven I cook food in?
No. Keep clay and food in separate ovens, permanently. Dedicate one oven to craft and never return it to food use, and never cure clay in your food oven.
What temperature does polymer clay cure at?
Follow your clay manufacturer’s specification — commonly in the region of 230°F to 275°F depending on brand — and verify the true cavity temperature with an oven thermometer rather than trusting the dial.
Why did my clay pieces come out brittle?
Under-curing is the usual cause. Extend the time at the correct, thermometer-verified temperature for the piece’s thickness instead of raising the heat.
Is convection good or bad for polymer clay?
Convection can improve evenness across a batch, which helps multi-piece cures. It does not remove the need for a thermometer, and pieces should still be shielded from direct element heat.
How long should I preheat a craft oven?
Until the thermometer holds your target temperature steadily through several heating cycles. Small ovens settle faster; large cavities need longer. Judge by the thermometer, not the clock.
Can polymer clay be cured more than once?
Yes — standard practice includes staged curing, where new clay is added to an already-cured piece and the whole piece is cured again at the specified temperature. This is how complex, layered work is built.