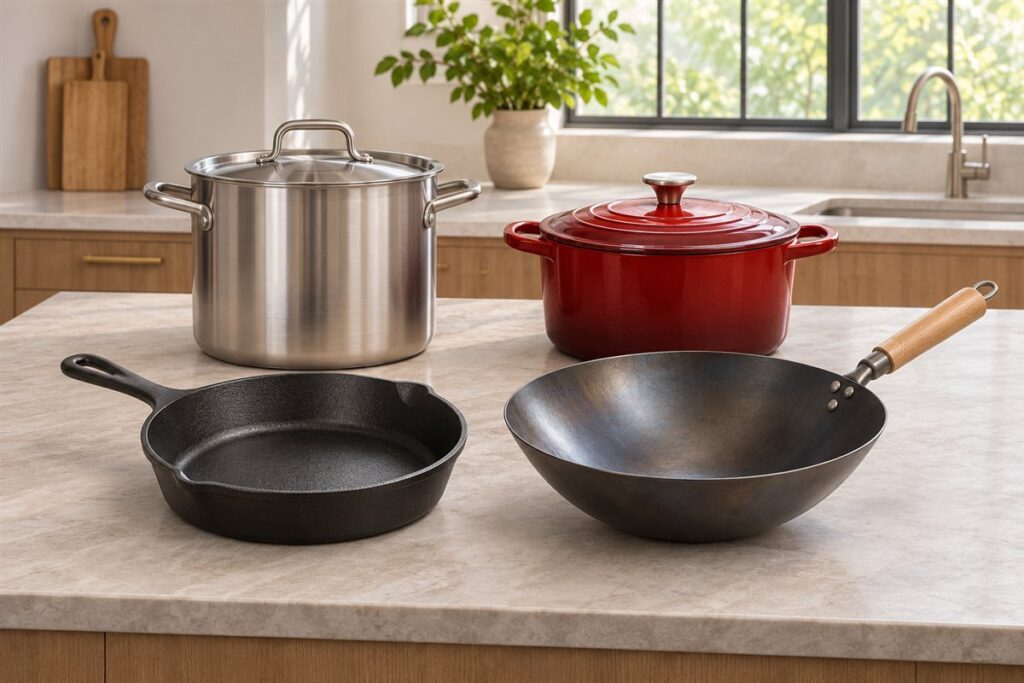
Enamel needs the cookware maker’s cleaning routine. A stain is not a reason to use a bare-cast-iron restoration method. The glassy coating is hard but can be marked by harsh tools, so gentle, patient cleaning is the safest start.
What to do
Let the vessel cool as directed, remove food gently and use approved cleaning products and tools. Inspect the surface and contact the maker about damage or an uncertain mark.
Wait until the pot is comfortably cool before it meets water. Sudden temperature changes can stress enamel.
Gentle cleaning steps
- Scrape loose food with a wooden or silicone tool rather than metal.
- Soak in warm, soapy water for stuck-on residue, longer if needed, instead of scrubbing hard.
- Wash with a soft sponge or nylon brush, following the maker’s approved list of tools.
- Try an approved method for stains, such as simmering water with a little baking soda if the maker allows it.
- Rinse and dry thoroughly, including the rim, which may be more exposed.
Avoid soaking for days. A few hours is generally plenty, and the maker’s instructions take priority.
A mistake to avoid
Do not use the cookware if its interior enamel is chipped when the maker prohibits that use. Cleaning cannot repair missing enamel.
Also avoid abrasive powders, steel wool and metal scouring pads unless the maker explicitly approves them, since they can dull or scratch the surface.
A detail worth checking
Keep the lid’s finish and knob in the cleaning plan. The vessel and lid can collect different residues, and the maker may specify different access or treatment for those parts.
The underside of the lid and the rim often hold grease. Check the knob material too, since some knobs have different heat or cleaning limits.
Try this practical check
Keep a photograph and model number for any persistent mark. Compare the approved care instructions before deciding whether the issue is residue, staining or damage.
Run a fingernail lightly over the mark. If it feels raised or rough, it may be residue. If it feels like a dent or missing area, it may be damage.
Common questions
Can I use the dishwasher?
Some makers allow it, but many suggest hand washing to protect the finish. Check the guidance for your piece.
How do I remove brown staining?
Stains are often residue and may lift with an approved gentle method. Avoid harsh tools, and ask the maker if the mark persists.
Why does the rim feel rough?
Rims are often exposed or thinly coated, and may need extra drying to prevent rust. Follow the maker’s advice for rim care.
Understanding the Enamel Surface
An enameled Dutch oven has a glassy coating fused to a metal body, usually cast iron. The coating protects the metal from rust, avoids the need for seasoning and gives a smooth surface that does not react with acidic foods. It can look very durable, but it is still a layer of glass-like material. It can chip from knocks, craze with sudden temperature changes and dull or scratch when scrubbed with harsh tools.
Different parts of the pot can have different finishes. The interior is often light colored and shows stains. The exterior may be glossy and colored. The rim is commonly exposed or less thickly coated, which makes it more vulnerable to chips and rust. The base underneath may be bare or matte. Look at the care guide from your maker, which should describe each area and what to avoid.
Because enamel varies between makers, do not assume that what suits one pot suits another. Check the instructions for approved cleaning tools and products, and for any warnings about dishwasher use, heat, or metal utensils. If you no longer have the paperwork, the maker’s website is a good place to look.
Treat the surface gently and you can keep it smooth for many years. Most problems come from impact, thermal shock or abrasive cleaning rather than from normal cooking.
Everyday Cleaning After Cooking
Routine cleaning is easier when you do it soon after cooking. Once the pot has cooled to a safe handling temperature, scrape out loose food with a wooden or silicone spoon. Wash with warm water, a small amount of mild dish soap and a soft sponge or cloth. Rinse well to remove soap, then dry with a soft towel so water spots do not form.
Pay attention to the lid. Wash the underside, the rim and the knob, and check the knob’s material, since some have different limits for heat or cleaning. The rim of both the pot and the lid collects grease, so run a cloth around it. Dry these areas well, as moisture can cause rust where the enamel is thin.
A few practical habits:
- Do not plunge a hot pot into cold water.
- Avoid leaving food sitting in the pot for long periods, especially acidic dishes.
- Use a plastic scraper for stubborn bits rather than metal.
- Store the pot with the lid slightly ajar or with a cloth between them, to allow airflow.
If the pot has been used for strongly flavored dishes, a thorough wash and drying usually removes odors. Persistent smells can sometimes be eased with a soak in warm water and a little baking soda, if the maker permits.
Removing Stubborn Residue and Grease
Burnt-on food and sticky grease call for patience rather than force. Fill the pot with warm water and a little dish soap, and let it soak for a few hours. This softens the residue so it can be lifted with a nylon brush or non-scratch sponge. If soaking alone is not enough, a simmer of water with a spoonful of baking soda may help, but only if the maker allows heating cleaning solutions in the pot.
After simmering, let the pot cool before handling, then scrub gently with a soft brush. Rinse and repeat if needed. Avoid scouring powders, steel wool and metal pads unless the maker explicitly allows them, since they can dull the enamel and cause fine scratches that hold stains.
For greasy buildup on the exterior or base, warm soapy water and a soft cloth are usually enough. A non-abrasive cleaner may help on stubborn marks, as long as it is approved for enamel. Test in a small, hidden area first.
Things to avoid:
- Harsh oven cleaners or bleach, unless the manual says otherwise.
- Prolonged soaks lasting days.
- Scraping with knives or metal spatulas.
- Dishwasher detergent in strong concentrations, which can dull the finish over time.
If residue remains after repeated gentle efforts, consult the maker’s care team rather than escalating to harsher tools.
Stains, Discoloration and Rim Care
Light interiors show stains from tomato, spices and long simmering. These stains are usually cosmetic and do not mean the pot is damaged. A paste of baking soda and water applied gently with a soft cloth may help lift them where the maker allows it. Repeated gentle cleaning is usually better than one aggressive attempt. Some brown or tan discoloration can also come from heat and may not fully disappear.
The rim needs special care. Many pots have an exposed or thinly coated rim that can chip or rust. Dry it thoroughly after washing. Some makers advise wiping a very light layer of cooking oil on bare rim areas to protect against rust, but follow their instructions. If you see rust-colored spots, wipe them off gently and dry the area more carefully in future.
Consider these checks:
- Is the interior surface smooth, or has it become rough?
- Are there chips, cracks or exposed metal inside the pot?
- Does the rim show rust or flaking?
- Is the lid sitting flat and securely?
Chips inside the pot, where food touches, are a particular concern. Many makers advise against using a pot with interior chips, since bits of enamel could come loose. Contact the maker if you find damage and keep photographs. Cleaning cannot repair missing enamel.
Storage and Protecting the Finish
How you store a Dutch oven affects its finish. Because these pots are heavy, they are easily bumped against other items. Keep the pot where it will not be knocked, and avoid stacking other cookware inside it unless you put a soft layer between them. Place a paper towel, cloth or felt protector under the lid to prevent contact between the lid and the rim, and to allow air to circulate.
On the stove, use the burner size appropriate for the base, and follow the heat guidance of the maker. Avoid heating an empty pot, which can stress the enamel. Allow the pot to cool before cleaning, and do not place a hot pot on a cold or wet surface, as this can cause thermal shock. Use a trivet at the table to protect your surface and the pot.
Handling tips include:
- Lift with both hands and use the handles properly.
- Protect countertops and sinks from the weight and from knocks.
- Line the sink with a mat or towel when washing.
- Use wooden, silicone or nylon utensils during cooking.
With thoughtful storage and gentle handling, you can keep the enamel glossy and smooth. If damage occurs, document it and follow the maker’s guidance on whether to continue using the pot.
Common Questions
Can I use baking soda on enamel?
Many makers allow a mild paste for stains, but check your care guide first. Use a soft cloth and rinse well. Avoid vigorous scrubbing.
Is it safe to use metal utensils in an enameled pot?
Many makers recommend against it, since metal can scratch or chip the surface. Wooden, silicone or nylon tools are safer choices. Check the manual.
What should I do if the enamel chips?
Stop and check the maker's guidance, since interior chips may mean the pot should not be used for cooking. Photograph the damage and contact the maker. Do not attempt a repair yourself.
How can I prevent rust on the rim?
Dry the rim thoroughly after washing and store the pot with air circulation. Some makers suggest a thin layer of oil on bare rim areas. Follow the manufacturer's advice.
Why does my pot have dark marks inside?
They may be stains from food, residue from heat or buildup of oil. Gentle cleaning can often lighten them. Cosmetic marks usually do not affect performance.
Can I take a hot Dutch oven from the oven to a cold counter?
It is better to use a trivet or heat-safe mat. Sudden temperature differences can stress the enamel. Never place a hot pot on a wet surface.
Related reading
6 Best Dutch Ovens: Enameled and Bare Cast Iron Compared (2026)