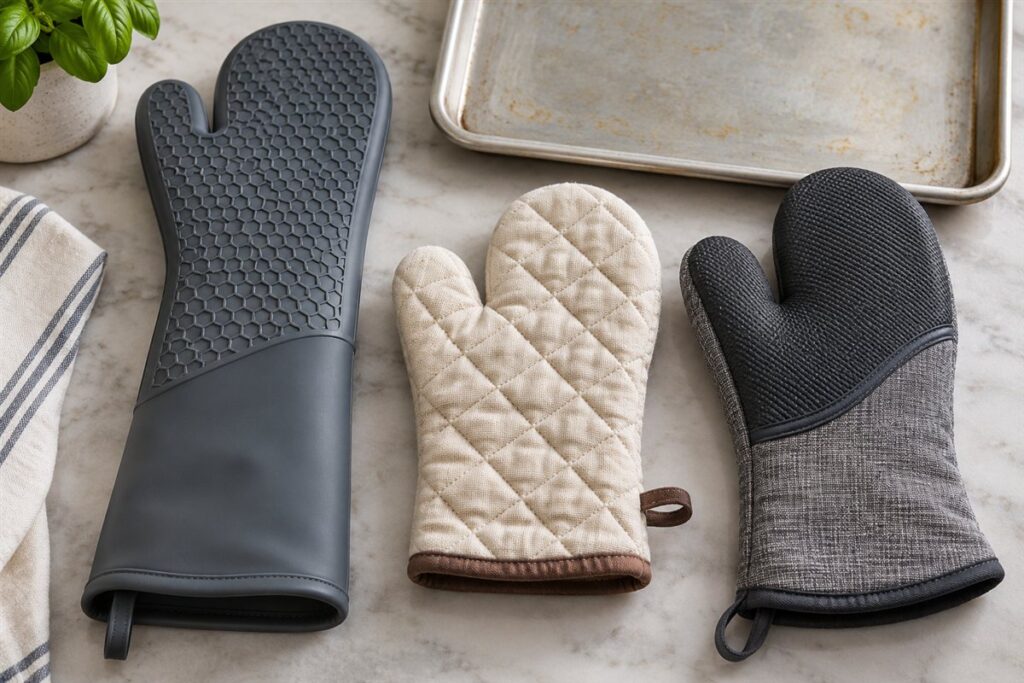
Choose oven mitts by material, length, grip and fit. Silicone handles wet or greasy surfaces, quilted cotton is flexible and comfortable, and fabrics blended with heat-resistant fibers give extra protection. Make sure the mitt is thick enough, long enough for your oven and not so bulky that you cannot hold a pan firmly. The sections below cover each choice, plus the habits that keep a mitt useful for years.
What Oven Mitts Do
An oven mitt gives a layer of insulation between your hand and a hot tray, pan or rack. No mitt gives unlimited protection, and heat will pass through over time, so lift quickly and set items down as soon as you can. Always read the maker’s guidance on heat limits and use.
Material Comparison
| Material | Strengths | Watch for |
|---|---|---|
| Quilted cotton | Soft, flexible, easy to wash | Soaks up liquid and may lose protection when damp |
| Silicone | Water-resistant, grippy, wipes clean | Can feel stiff; check how the maker lines the inside |
| Aramid or heat-resistant fiber blends | Strong insulation in a slim shape | Follow the maker’s washing and use notes |
| Leather | Sturdy, good for grills and fireplaces | Heavy, harder to clean |
Fit and Length
A good mitt should slide on easily and leave enough room to flex your fingers. A mitt that is too large can slip, and one that is too small leaves skin close to the fabric. Long cuffs, around twelve to fifteen inches, protect the wrist and forearm when reaching into a deep oven. Shorter mitts are easier for stovetop work.
Some people like a mitt with a separate thumb for better grip. Others prefer a pot holder pad for flat items. Keep a pair for each cook who uses your kitchen, in sizes that fit.
Grip and Comfort
- Textured silicone patches or ridges help hold slippery pans.
- A loop at the cuff lets you hang the mitt by the stove.
- A lining that wicks moisture can improve comfort.
- Padding should be even, with no thin spots in the palm or fingers.
Single Mitt, Pair or Glove Style?
Mitts come as a single piece sold alone, as a matched pair, or as a glove with separate fingers. A single mitt is traditional: the whole hand sits in one mitten-shaped pocket with a thumb. It is easy to slip on and off but gives less precise finger control. A pair is useful because most heavy lifts need both hands. Glove styles give better dexterity for jobs like turning a tray, though they take longer to put on and can feel thicker at the fingertips. Choose by the job you do most often, and remember that a mitt you find awkward is a mitt you are tempted to skip.
A Worked Example: Checking a Mitt Before You Cook
- Lay the mitt flat in good light and look over both sides for burn marks, holes and frayed seams.
- Press the palm and fingertips between your thumb and fingers. The padding should feel even, with no hard or flattened patches.
- Check that the mitt is completely dry, including the inside lining.
- Put it on and close your hand around the rim of a cold pan. Notice whether you can hold it firmly without the mitt twisting.
- Confirm the cuff reaches past your wrist so a hot rack cannot touch bare skin.
- Hang it within reach of the oven before you turn the oven on, not afterwards.
This takes under a minute and tells you far more than the label ever could about how a particular mitt has aged.
Common Scenarios
Baking trays and cookie sheets
Thin metal trays have narrow rims. A mitt with a flexible thumb and a modest thickness lets you pinch the rim firmly.
Heavy cast pots
A thick pad with textured grip is helpful, and a pair is better than one mitt because the weight needs both hands.
Steamy or wet jobs
When lifting a lid or a pot of simmering food, steam and splashes can soak fabric. A water-resistant surface helps, and the lid should be tilted away from you.
Outdoor grill or fire
Only use a mitt that the maker states is intended for this. Ordinary kitchen mitts may not be suited to the higher heat or open flame.
Mistakes to Avoid
- Using a wet mitt. Water inside the padding conducts heat toward your skin much faster than dry padding does.
- Choosing the thickest mitt automatically. Very bulky padding reduces grip, which can make a drop more likely than a thinner mitt would.
- Skipping the inspection. Worn spots are invisible when the mitt is on, but they are where heat gets through.
- Holding the mitt over a flame. Fabric near a gas flame or a hot element can scorch or catch.
- Wiping hands on the mitt. Grease and food residue build up and can make the fabric stiff and slippery.
Care and Upkeep Over Time
Follow the washing label, since some mitts tolerate a machine and others need a gentle hand wash or a wipe. Silicone surfaces usually clean with warm soapy water, but check the maker’s note on the lining. Let any washed mitt air dry completely before it goes back on its hook, because damp padding insulates poorly and can smell. Rotate between two pairs if you cook daily, which also spreads out the wear. Replace a mitt when the palm shows burn marks, the stitching loosens, or the padding feels thin or hard.
Quick Troubleshooting
| Symptom | Likely cause | What to try |
|---|---|---|
| Heat is felt through the palm | Padding worn thin or damp | Use a dry mitt and replace the worn one |
| Pan slips in the mitt | Smooth surface or grease on the fabric | Wash the mitt or choose a textured grip |
| Mitt is hard to put on | Opening is narrow or the lining is stiff | Try a larger opening or a softer lining |
| Stiff, shiny patches | Baked-in grease or heat damage | Wash if the label allows; replace if the patches remain |
| Fingers feel cramped | Mitt is too small or too thick | Try a different size or a slimmer fabric |
Glossary
- Cuff: the open end that extends over the wrist and forearm.
- Aramid: a family of heat-resistant synthetic fibers used in some mitt fabrics.
- Quilting: stitched layers that trap air to add insulation.
- Lining: the inner layer touching your hand.
- Hanging loop: a strap at the cuff for storing the mitt on a hook.
- Pot holder: a flat pad used to grip handles rather than covering the hand.
FAQ
Can I use a towel instead?
A towel is not built for the job and may slip or catch fire near heat. A proper mitt is a better tool. Damp towels also conduct heat quickly.
How many pairs do I need?
One pair for the oven and one spare is a practical household minimum. The spare covers laundry days and gives you a dry pair if the first gets splashed.
Are silicone mitts safer than cotton?
Neither is risk free. Silicone resists water and grips well, while cotton is flexible but absorbs liquid. Read the maker’s heat guidance and use the type that suits the task.
How do I know when a mitt is worn out?
Look for burn marks, holes, hardened areas, loose seams or padding that feels thin. Any of these means it is time to replace it.
Can I put mitts in the dishwasher or washing machine?
That depends on the material and the label. Follow the care instructions supplied with the mitt, and dry it fully afterwards.
The Short Version
Choose mitts that fit well, have a grippy surface and enough length for your oven. Keep them dry, check them often and replace them when worn. Hang them where you can reach them before the oven is hot.
Related Guides
- 6 Best Oven Mitts: Silicone and Cotton Pairs and Sets (2026)
- How to Choose a Fillet Knife for Fish: Length, Flex and Grip
- How Cookware Handles Differ: Materials, Shapes and Grip
- Pan Handle Types Made Simple: Materials, Shapes and Grip
- Oven Safe Cookware Guide: Materials, Handles and Lids