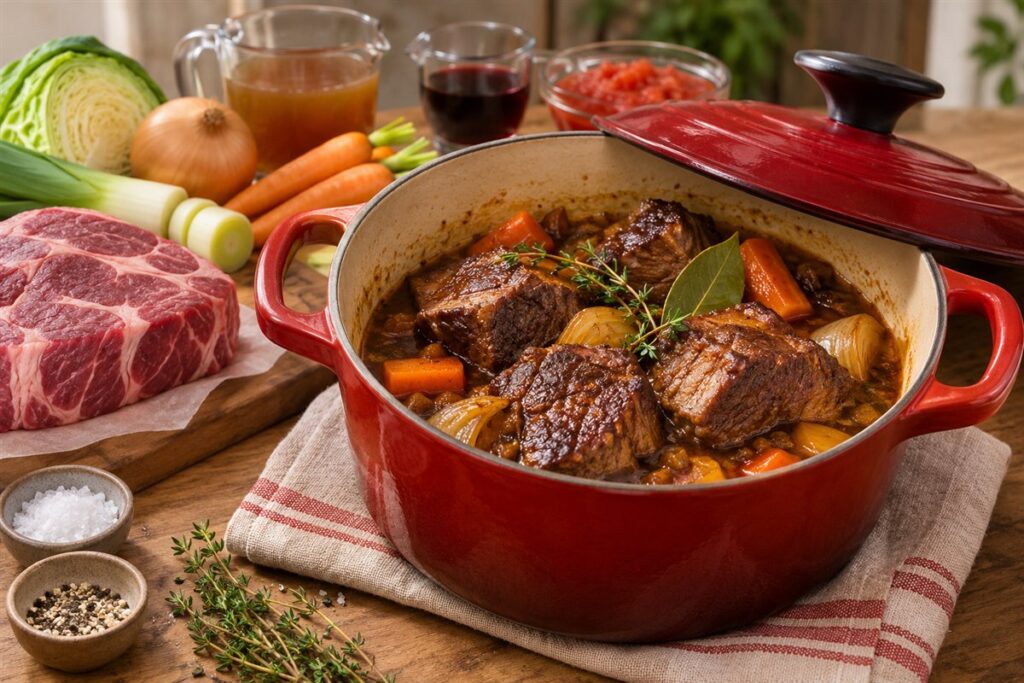
Braising means browning food, adding a modest amount of liquid, then cooking it covered at low heat until tender. A Dutch oven is ideal because its heavy walls and snug lid hold steady heat. The method suits tougher cuts and firm vegetables.
What Braising Does
Dry browning builds flavor on the outside. The covered, gentle cooking that follows softens tough fibers and turns the liquid into a sauce. The liquid usually reaches only part way up the food, so the top stays exposed to moist steam.
The Basic Steps
- Pat the meat dry and season it. Dry surfaces brown better.
- Heat a little oil in the Dutch oven over medium-high heat.
- Brown the meat in batches without crowding. Remove it to a plate.
- Lower the heat and cook onions, carrots or other aromatics in the same pot, scraping up browned bits.
- Add liquid such as stock, wine, tomatoes or a mix, enough to come about one third to one half up the meat.
- Return the meat, bring to a bare simmer, cover tightly and cook on low heat, or in an oven at a low to moderate setting.
- Check occasionally. Turn the meat if you like and add liquid if the pot looks dry.
- When fork-tender, lift the meat out and rest it. Reduce the liquid in the pot if you want a thicker sauce.
Cooking time depends on the cut and size, often ranging from about an hour and a half to several hours. Use a thermometer and follow local food-safety guidance for minimum internal temperatures.
Choosing What to Braise
| Food | Why it suits braising |
|---|---|
| Beef chuck or short ribs | Connective tissue softens with long, gentle heat |
| Pork shoulder | Stays moist and pulls apart easily |
| Chicken thighs | Cook faster but still benefit from covered heat |
| Cabbage, fennel, leeks | Soften and sweeten in a small amount of liquid |
Handling and Care
- Use dry oven mitts, and treat the lid and handles as hot.
- Let the pot cool before washing to avoid cracking enamel.
- Avoid metal tools on enameled surfaces if the maker advises against them.
Finishing the Sauce
When the meat is tender, the liquid in the pot has become a flavorful base. Skim off excess fat from the surface with a spoon, then simmer the liquid uncovered for a while to thicken it. Taste and adjust with salt, a splash of vinegar or fresh herbs. Serve the sauce spooned over the meat with mashed potatoes, rice, polenta or bread.
Picking and Prepping the Cut
A braise is only as good as the cut that goes into it. Look for cuts that contain plenty of connective tissue and some fat, because long, moist cooking converts them into tender, rich-tasting meat. Shoulder, shank, ribs and cheek cuts are the traditional choices. Lean, tender cuts dry out and turn stringy in a braise, so save them for quick cooking. If you are not sure what suits braising, ask the butcher or check the package label for suggested uses.
Size and shape affect timing. Large pieces take longer but stay moist, while small cubes cook faster and can overcook. Cut pieces to roughly the same size so they finish together. Trim excess hard fat if you like, but leave some for flavor. Bone-in cuts add richness from the bones and marrow, and often hold up better to long cooking.
- Take meat out of the refrigerator briefly before browning so it is not ice cold.
- Pat it dry with paper towels.
- Season with salt ahead of time if your recipe calls for it.
- Store raw meat on a lower refrigerator shelf, apart from other food.
Vegetables can be braised on their own or alongside meat. Firm vegetables such as fennel, cabbage, leeks and root vegetables hold up well. Cut them into large pieces so they do not disintegrate. If you add vegetables to a meat braise, consider adding them partway through so they do not turn to mush.
Choosing the Braising Liquid
The liquid does more than keep the pot moist. It becomes the sauce, so its flavor counts. Stock is the common base, and its quality shows in the finished dish, so choose one you like the taste of. Wine adds acidity and depth, but if you use it, let it simmer briefly to cook off the sharpest edge. Beer, cider and tomatoes also work, each bringing its own character. Water is acceptable when the other ingredients are rich in flavor.
Acid balances rich meat and softens tough fibers. Tomatoes, vinegar, citrus and wine all help, but too much can make a sauce sharp, so taste and adjust at the end. Sweetness from onions, carrots or a touch of sugar can balance the acid. Salt needs care because the liquid concentrates as it reduces. Season lightly at the start and finish at the end.
- Use enough liquid to come part way up the food, not to cover it completely.
- Warm the liquid before adding it so the pot does not drop in temperature.
- Add herbs such as thyme, bay leaf or rosemary early, and fresh herbs at the end.
- Choose low-sodium stock if you plan to reduce the sauce.
Check your recipe for how much liquid to use. A smaller pot needs less than a larger one, since the same volume of liquid will come up higher around the food.
Oven Braising Versus Stovetop Braising
You can braise on the stove or in the oven, and each has a different feel. On the stovetop, heat comes from below and you can see and adjust the simmer easily. The bottom of the pot may cook faster than the top, so stir or turn the food now and then. This method suits smaller dishes and recipes that are watched closely.
In the oven, heat surrounds the pot, which gives gentler and more even cooking. Once the pot is in the oven, you can leave it for longer between checks. A moderate to low oven setting is typical, but the exact temperature depends on the recipe. Confirm that your pot, its lid and the knob are rated for the temperature you plan to use. If you are unsure, check the maker’s guide.
A good simmer should be gentle, with just a few small bubbles breaking the surface. A vigorous boil can toughen meat and reduce the liquid too quickly. If the liquid is bubbling hard, lower the heat. A tight lid helps to hold in moisture, and if your lid does not seal well, a piece of parchment between the pot and lid can help, provided it stays clear of the heat source.
- Use the lowest rack position that lets the pot sit with space around it.
- Rotate the pot partway through if your oven has hot spots.
- Always use thick, dry oven mitts for the pot and lid.
Testing Doneness and Resting
The clock is only a guide. Braised meat is ready when a fork slides in with little resistance and the meat starts to pull apart. If it feels tight or springy, it needs more time. Cooking longer is usually the answer, not higher heat. Different cuts need different times, so check early and often once the minimum time has passed. For food-safety guidance on safe internal temperatures, consult your local food-safety authority and use a thermometer.
Resting matters, too. Let the meat sit in the liquid for a short while after cooking, or on a plate covered loosely, so the juices settle. Meat removed from the pot and sliced at once can lose moisture. If you plan to serve the dish the next day, many cooks cool the braise in its liquid and refrigerate it, since flavors develop and the fat can be lifted off the surface after it has solidified.
- Cool leftovers promptly in shallow containers.
- Reheat gently, covered, with a splash of liquid if needed.
- Strain the sauce if you prefer a smooth texture.
When the sauce tastes flat, a squeeze of lemon or a splash of vinegar can wake it up. If it tastes harsh, a small amount of fat or sweetness can soften it.
Troubleshooting Common Braising Problems
Most braising problems come from a few causes. If the meat is dry, the cut may have been too lean, the heat too high or the lid not tight enough. If the meat is tough, it usually needs more time at a gentle simmer. If the sauce is thin, remove the meat and reduce the liquid uncovered, and if it is too salty, add unsalted liquid or a starchy vegetable and reduce the seasoning next time.
If the bottom of the pot scorches, the heat may have been too high, or the liquid may have run low. Use a heavy pot, lower the heat and check the liquid level. If the sauce is greasy, skim fat from the surface with a spoon or chill it so the fat hardens and lifts off easily. If flavors seem dull, consider more browning, more aromatics or a final splash of acid.
- Pale meat: the pan was crowded or the meat was wet when browned.
- Mushy vegetables: they went in too early or were cut too small.
- Bitter sauce: burned browned bits or garlic; avoid over-browning.
Keep notes for next time. Writing down the cut, the pot size, the oven setting and the time helps you repeat what worked and adjust what did not. Braising rewards patience, and a little record-keeping turns each attempt into a better one.
FAQ
Is braising the same as stewing?
They are close cousins. Stews usually cover smaller pieces with more liquid, while braises use larger pieces and less liquid.
Do I need to brown first?
You can skip it, but browning adds depth of flavor and color to the finished dish.
Can I braise in a regular pot with a lid?
Yes, if the pot is heavy enough and the lid is snug. Thin pots scorch more easily, so use lower heat and check the liquid more often.
How much liquid should I use?
Usually enough to come about a third to a half of the way up the food, though recipes vary. Too much liquid turns a braise into a boil.
Can I braise ahead of time?
Yes. Many braises improve after resting overnight in the refrigerator. Cool promptly, store safely and reheat gently until hot throughout.
What can I braise besides meat?
Firm vegetables, beans in some recipes and tofu can be braised. Adjust the time to the ingredient, since vegetables cook much faster.
Why did my braise turn out watery?
Vegetables and meat release liquid as they cook. Remove the food and simmer the sauce uncovered to reduce it, or leave the lid slightly open for the last part of cooking.
Should the lid stay on the whole time?
Mostly yes, to hold in moisture. Lifting it briefly to check is fine, and some recipes finish uncovered to thicken the sauce.
Can I use a slow cooker instead?
Many braise recipes can be adapted, but browning should still be done in a pan first. Follow the appliance's instructions and expect a slightly different texture.
The Short Version
Brown, add a partial amount of liquid, cover and cook gently until tender. A heavy Dutch oven keeps the heat even. Check doneness with a thermometer and food-safety guidance, and follow the maker’s care instructions.