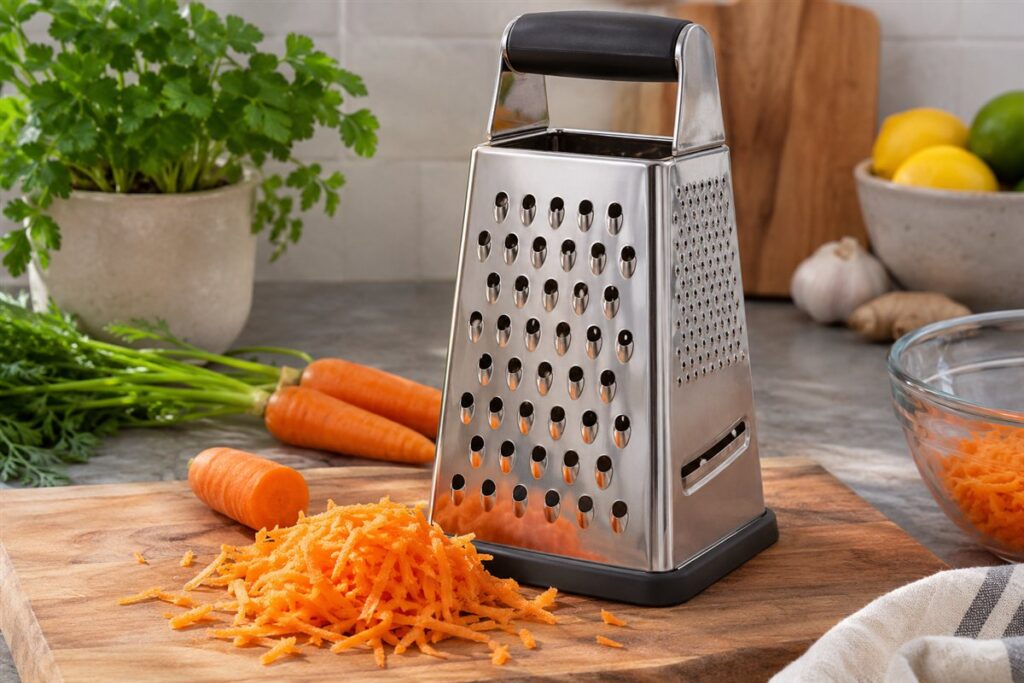
A good box grater has sharp, clearly different blade faces, a stable base, a comfortable handle and a size that fits your bowls and storage. Four sides is the usual layout, covering coarse shreds, fine shreds, slices and a zesting surface. The sections below add a worked shredding routine, scenarios, mistakes, troubleshooting and care advice.
What the Four Sides Do
Most box graters offer a set of faces with different jobs. Knowing them makes it easier to judge a model on the shelf.
- Large holes: Coarse shreds for cheese, cabbage and carrots in slaw.
- Small holes: Fine shreds for hard cheese, ginger or chocolate.
- Slicing slot: Thin slices of cucumbers, potatoes or firm fruit.
- Fine rasp: Zest from citrus, nutmeg and garlic paste.
Some models add a fifth face, such as a ribbon blade or a very fine surface for soft cheese.
Features to Compare
| Feature | Why it matters | What to check |
|---|---|---|
| Blade sharpness | Sharp edges cut cleanly with less pressure | Crisp, evenly punched holes with no burrs |
| Material | Durability and rust resistance | Stainless steel is common; check the maker’s care advice |
| Base | Prevents sliding on the counter | A rubber or silicone base, or a flat grippy foot |
| Handle | Comfort and control | A wide handle that fits a full hand, with space for your knuckles |
| Height | Longer strokes grate more per pass | Tall enough to work, but short enough to store |
| Catch container | Collects food | A detachable container with a lid for storage |
| Cleaning | Food sticks in the holes | Dishwasher advice from the maker, and a brush for the edges |
Using It Comfortably
- Place the grater on a board or in a wide bowl so it cannot slip.
- Hold the handle firmly with one hand.
- Press the food lightly and move it down the face in long, even strokes.
- As the piece gets small, use the hand guard or stop and save the last bit for another use.
The blade faces are very sharp. Keep fingers away from the surface and follow the maker’s safety instructions.
Cleaning Tips
Rinse the grater straight after use before food dries in the holes. A stiff brush pushed against the direction of the strokes clears stuck bits. Avoid scrubbing with a cloth, which can catch on the edges. If the maker says it is dishwasher friendly, place it so that water reaches all faces. Dry it before storing to avoid rust.
Over the long term, inspect the faces for bent or flattened edges, which show up as food that tears or needs extra force. Keep the grater where its blades will not rub against other tools, and use a sleeve or a drawer slot if the maker provides one. Wipe away any citrus oil or sticky residue promptly, since acids and sugars can mark the metal. If the base is removable or has a rubber foot, check from time to time that it is still firmly attached and clean underneath it.
Worked Example: Shredding Cheese for a Baked Dish
Cheese is the most common job for a box grater, and a few habits make it faster and tidier.
- Chill the cheese. Soft and semi-soft cheeses shred more cleanly when cold and firm. If a block feels soft, leave it in the fridge for a short time, or place it in the freezer briefly if your recipe allows.
- Set the grater on a large board or inside a wide bowl. A damp cloth under the board stops it moving.
- Choose the large-hole face for melting cheeses and the small-hole face for hard cheese used as a topping.
- Hold the cheese block by its widest part and draw it down the face with moderate pressure, working in one direction. Let the shreds fall into the bowl or container.
- Rotate the block as you go so that you use the whole surface and keep the piece easy to hold. When the block gets short, stop and use the leftover for another purpose, such as slicing.
- Use the shreds soon, or store them in a covered container in the fridge according to the packaging and food-safety guidance. Wash the grater straight away so cheese does not harden in the holes.
Common Scenarios
A busy household that shreds cheese often
A tall, stable box with a large catch container is helpful. A wide base and a comfortable handle matter more than extra faces.
Occasional use for zest and spices
A fine rasp that is separate from the box, or a box with a good fine face, covers citrus and nutmeg. Wipe the surface with a brush rather than a cloth.
Salad and slaw preparation
The large holes and slicing slot are the most useful. Cut vegetables into pieces that fit the width of the face, and use a safe holder for the end of the piece.
A small kitchen
A slim box or a flat grater stores more easily. Check the height with the handle, and see whether the catch container stacks into other bowls.
Mistakes to Avoid
- Pushing hard. Pressure makes slips more likely and does little for speed. Sharp edges need only a light touch.
- Working on a moving surface. Use a board or a bowl that cannot slide.
- Shredding warm, soft cheese. It clogs the holes; chill it first.
- Washing with a cloth or sponge in the usual way. Edges can catch on the cloth, and fingers can be cut. Use a brush.
- Leaving it wet. Moisture can lead to rust spots over time.
Quick Troubleshooting
| Symptom | Likely cause | What to try |
|---|---|---|
| Cheese clumps and clogs | Cheese too soft or warm | Chill it, or use the large holes |
| Grater slides on the counter | Smooth base or damp surface | Place it on a board with a damp cloth or choose a base with a grip |
| Food tears instead of shredding | Dull blades or too much pressure | Use lighter strokes; if the edges are worn, replace the grater |
| Rust spots | Moisture or a thin finish | Dry it fully after washing and follow the maker’s care advice |
| Hand cramps | Narrow handle or too much pressure | Choose a wider handle and a gentler stroke |
Glossary
- Rasp: A very fine grater surface with tiny raised teeth.
- Zest: The colored outer skin of citrus fruit, without the bitter white pith.
- Burr: A rough edge left on a punched hole, which can make a grater scrape.
- Hand guard: A holder that keeps your fingers away from the blades as the food gets short.
- Ribbon blade: A face that cuts wide, thin strips.
FAQ
Is a box grater better than a flat one?
A box offers several faces and stands on its own, while a flat grater is easier to store. Many cooks like having both.
Why does cheese stick?
Soft cheese clings to fine faces. Chilling it briefly before shredding often helps.
Can I use it for zesting?
Yes, if it has a fine rasp face. Zest only the colored part of the skin, since the white layer underneath is bitter, and wash citrus fruit before zesting.
How do I keep my knuckles safe?
Hold the food with a relaxed grip, keep your fingertips curled back from the face and stop when the piece becomes small. A hand guard or holder helps with short pieces.
How long should a grater last?
Quality stainless steel can last for many years with careful washing and drying. Replace it when the edges no longer cut cleanly or the frame is bent or rusted.
The Short Version
Choose a box grater with sharp, distinct faces, a non-slip base and a comfortable handle. Clean it right after use and keep fingers well clear of the blades.