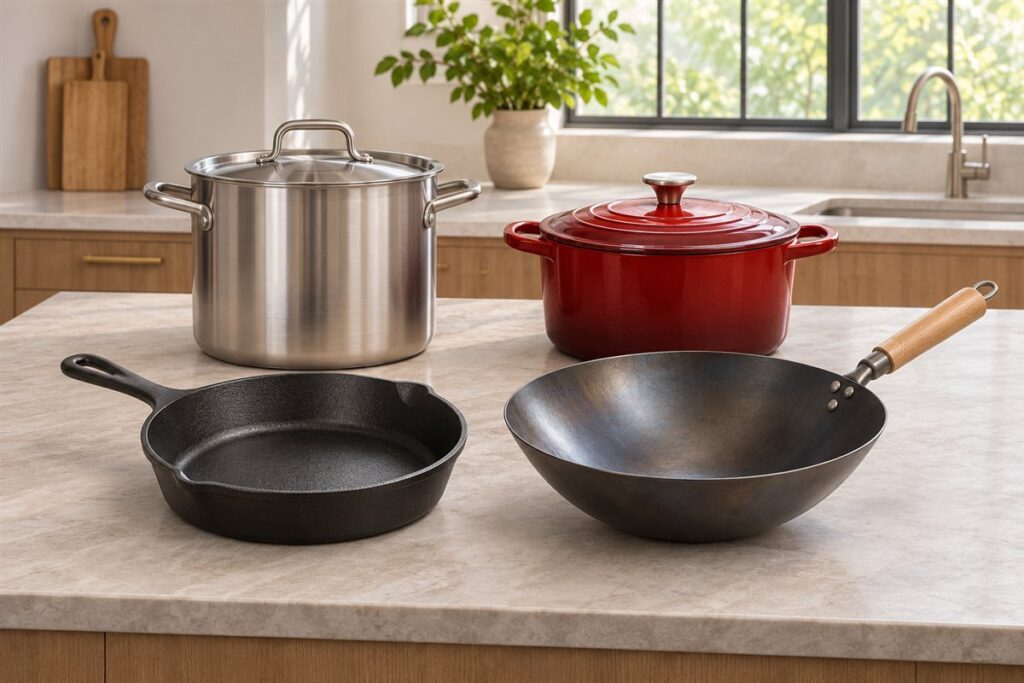
Enameled cast iron cleans up more easily than bare iron because the glassy coating keeps food from soaking into the metal. The goal is to be gentle: let the pot cool, use soft tools and avoid harsh scouring. Here is a simple routine and what to do when food sticks.
Everyday Washing Routine
- Let the pot cool until it is comfortable to touch. Cold water on a hot pot can stress the coating.
- Fill the pot with warm water and a little mild dish soap.
- Wipe the inside with a soft sponge or dishcloth.
- Rinse with warm water and check that no soap film remains.
- Dry with a towel straight away, especially around the rim, where bare iron can show.
When Food Is Stuck On
Do not reach for metal scrapers or steel wool, because they can scratch the surface. Instead, try these gentle steps in order:
- Soak the pot in warm soapy water for 20 to 30 minutes, or longer for baked-on food.
- Loosen softened bits with a wooden spoon or a nylon scraper.
- For stubborn patches, simmer a little water with a spoonful of baking soda in the pot for several minutes, then let it cool and wipe.
- If stains remain, use a non-scratch cleaning pad or a cleaner that the maker approves for enamel.
- No seasoning is needed on the enameled interior.
- Rust protection is only needed on exposed iron, usually the rim.
- Gentle tools matter more than heavy scrubbing.
- Thermal shock is a concern for the coating as well as the iron.
- A soft sponge for everyday washing.
- A nylon brush for stuck-on food.
- A plastic or wooden scraper for corners.
- A soft towel for drying.
- Wiping spills on the outside as soon as the pot has cooled.
- Cleaning the lid underside, where condensation and grease collect.
- Checking handles for any looseness or damage.
- Drying every part before storage.
- A tacky or rough feel on the surface.
- Dark rings forming at the liquid line.
- Food that starts to stick more than it used to.
- Smells that return after cooking.
- Chips or flaking on the cooking surface.
- Cracks that extend through the enamel.
- Rust that keeps returning and spreading.
- A warped base that rocks on the burner.
Dealing With Stains and Marks
| Problem | Gentle approach | Avoid |
|---|---|---|
| Brown film inside | Baking soda paste and a soft cloth | Abrasive powders |
| Dark ring on the outside | Warm soapy water and a soft brush | Metal pads |
| Dull rim | Wipe dry, then add a trace of oil on exposed iron if the maker advises | Leaving it damp |
Habits That Protect the Coating
Use wooden, silicone or nylon utensils. Avoid heating the pot empty, and do not move it quickly from a hot burner to cold water. Store it with a paper towel or cloth between the pot and lid so the rims do not chip. Always read the maker’s care sheet, since dishwasher advice varies.
Chips are worth watching for. If the coating chips and bare iron shows inside the pot, small flakes may come off into food, so many makers advise retiring a pot with interior damage. Chips on the outer rim are mostly cosmetic, though they can rust, so dry the area and keep it lightly oiled if the maker allows. Check your pot occasionally under good light, and contact the maker if you are unsure.
Enamel Versus Bare Cast Iron Care
Enameled cast iron looks like traditional cast iron, but its cleaning rules are different. Bare cast iron relies on a layer of baked-on oil called seasoning, and many owners avoid soap and soak. Enameled pieces have a glassy coating, so there is no seasoning to protect and ordinary dish soap is generally fine. Applying bare-iron habits, such as oiling the interior or scrubbing hard with salt, can create problems on enamel.
The coating is hard but not indestructible. It can chip if knocked, stain with long cooking, and dull when scoured. The raw iron at the rim or base may be exposed in places and can rust if left damp. Because designs differ, check the maker’s care guide for the finish on each area.
Keep these differences in mind:
If you own both types of cookware, store the tools and cleaning supplies separately so you do not mix up the routines. A quick label or a note on the maker’s instructions can help others in the household treat each piece correctly.
Choosing Cleaning Tools
The tool you use determines whether the finish stays smooth. Soft sponges, microfiber cloths and nylon brushes are suitable for most enameled pieces. Wooden and silicone scrapers help with stuck food. Avoid metal scouring pads, steel wool and rough abrasives unless the maker states they are safe, as they can dull and scratch the enamel and make stains stick more easily.
Detergent choice matters as well. Mild dish soap is usually fine. Strong chemical cleaners, bleach and oven cleaners may harm the finish, so use them only if the manual allows. Powdered cleansers are abrasive and can create fine scratches. If you want an extra cleaning boost, baking soda is mild enough for many makers, but check the guidance.
Consider having a few dedicated tools:
Keep these tools clean and replace worn ones, since a dirty or gritty sponge can scratch. Rinse tools after use and let them dry. If you are unsure whether a product is safe, test it on a small, hidden area, such as the underside, before using it on the cooking surface. Gentle tools and patience protect the coating better than any strong product.
Cleaning the Exterior, Base and Lid
The inside gets most of the attention, but the outside of the pot needs care too. Grease spatters and cooking residue build up on the exterior and, if left, can bake into a sticky film. Wash the sides with warm soapy water and a soft cloth, working in sections. For stubborn marks, soak a cloth in warm soapy water, lay it on the spot for a few minutes and wipe again.
The base can collect burnt-on residue, especially on gas burners or when food boils over. Clean it with a soft brush and take care not to scratch the base, which may be bare enamel or exposed iron. Dry it well. If the base rocks or does not sit flat, avoid forcing it onto the burner and consult the maker.
The lid is a separate area to check. Clean the underside, the rim and the knob. Knobs may be made of different materials, such as metal or phenolic plastic, with different heat limits and care needs. Look at the manual before using any cleaner on them. Dry the lid rim thoroughly, as water can collect there and cause rust.
Handy habits include:
Consistent light cleaning prevents the need for heavy scrubbing later.
Odors, Flavors and Residue Buildup
Enamel does not absorb flavors as readily as some materials, but smells can linger after cooking garlic, fish or strong spices. A thorough wash with warm soapy water usually removes them. If a smell persists, soak the pot in warm water with a small amount of baking soda, then rinse and dry, as long as the maker permits. Leaving the pot open to air for a while can also help.
Over time, a thin film of oil or food can build up, especially on the interior walls above the usual cooking line. It may feel slightly sticky or look cloudy. Regular washing prevents it from hardening. For existing buildup, a longer soak and a gentle scrub with a nylon brush often loosens it. Do not rush this with abrasive tools.
Signs of buildup include:
It is important to distinguish buildup from damage. Buildup can be cleaned, while worn or crazed enamel cannot. If the surface feels rough even after cleaning, inspect it for fine cracks or chips. Pay attention to the interior where food sits. If the coating is damaged there, follow the maker’s guidance on continued use.
Inspecting and Storing Between Uses
Cleaning is a good time to inspect. Run your fingertips lightly over the interior, rim and lid edges, feeling for chips, rough spots or cracks. Look at the light, since small defects are easier to see at an angle. Fine lines called crazing can appear with age or heat shock, and chips expose the iron beneath, which can rust.
If you find damage, take photographs and check the maker’s guidance on whether the piece is still suitable. Some makers advise stopping use if the interior is chipped. Do not try to repair enamel with paint or fillers unless the maker approves.
For storage, make sure the pot is fully dry. Place a paper towel, cloth or felt pad between the lid and the pot so air circulates and the rim is not knocked. Avoid stacking heavy items inside or on top. Keep the pot where it cannot be bumped, and lift rather than slide it across surfaces.
Replace or retire the pot if you notice:
With gentle cleaning, careful drying and thoughtful storage, enameled cast iron can serve for years.
FAQ
Can I put it in the dishwasher?
Some makers allow it, but handwashing is usually kinder to the coating and the rim. Check the manual.
Why is the inside turning brown?
Cooking residue and light heat marks are common. Gentle cleaning with baking soda often helps.
Can I use baking soda on enameled cast iron?
Many makers allow a mild paste, but check your care guide. Use a soft cloth and rinse thoroughly. Avoid hard scrubbing.
Do I need to season enameled cast iron?
No, the enameled interior does not need seasoning. Bare iron areas, such as the rim, may benefit from protection if the maker advises it. Follow the manual.
Is it safe to use metal utensils?
Many makers recommend against it, since metal can scratch the surface. Wooden, silicone or nylon tools are usually safer. Check your pot's instructions.
Why does the rim look rusty?
The rim may have exposed iron that reacts with moisture. Dry it thoroughly after washing and follow any maker advice on protecting it. Wipe off surface rust gently.
Can I clean the pot while it is still hot?
It is better to let it cool first. Sudden temperature changes can stress the enamel. Wait until it is safe to handle.
How do I clean a stuck-on spot without scratching?
Soak with warm soapy water, then loosen the spot with a wooden or silicone scraper or a nylon brush. Repeat the soak if needed. Avoid metal tools and harsh abrasives.
The Short Version
Cool the pot, wash it with warm soapy water and a soft sponge, and soak anything stuck. Avoid metal tools and thermal shock, and dry it well.