Disclosure: topratedkitchenware.com is reader-supported. When you buy through links on our site, we may earn an affiliate commission from Amazon and other retailers, at no extra cost to you.
Where to buy
If you are shopping for the best food processors for nut flour grinding, the six models below are the shortlist this guide is built around. Prices and availability change often on Amazon, so use the links to check the current listing before you buy. Orders are placed on Amazon, and the listing there carries the full manufacturer detail for each model.
- Best Overall for Grinding: Cuisinart Elemental 4-Cup Chopper/Grinder — Check on Amazon
- KitchenAid 3.5 Cup Food Chopper — Empire Red — Check on Amazon
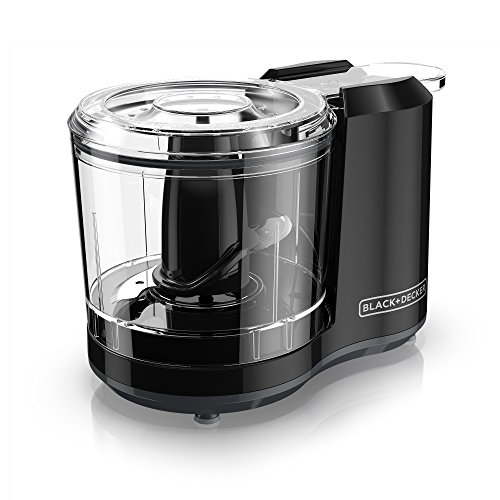
- BLACK+DECKER 1.5-Cup Electric Food Chopper — Check on Amazon
- KitchenAid 3.5 Cup Food Chopper — Contour Silver — Check on Amazon
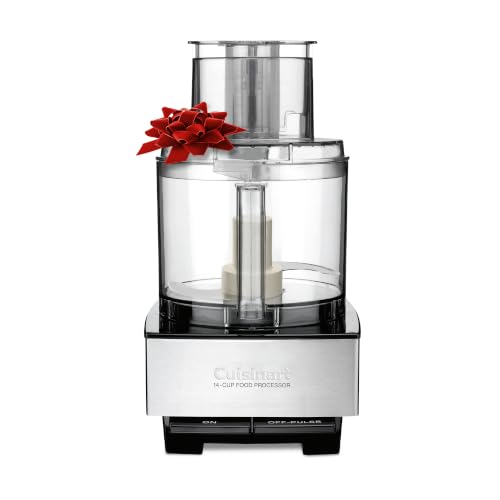
- Cuisinart 14-Cup Food Processor DFP-14BCNY — Check on Amazon
- Cuisinart 14-Cup Food Processor FP-1400 — Check on Amazon
Read the full guide ↓
The best food processors for nut flour grinding are chosen by a technique, not just a task. Where our companion flour guide focuses on the ingredient and its uses, this one focuses on the grinding itself: the load sizes, pulse rhythms, temperatures, and sifting passes that turn whole nuts into an even, dry flour — and the ways each of these six machines supports or resists that technique. Grinding is the moment of transformation, and it is unforgiving of impatience: ten seconds too long, a load too large, nuts too warm, and flour becomes paste in the centre of the bowl while the edges are still coarse.
The encouraging news is that grinding technique is learnable, quick to learn, and almost entirely about rhythm. Nuts do not want to be processed; they want to be persuaded — broken down in bursts, redistributed, rested, and burst again, with a sieve standing by to separate the finished flour from the stubborn pieces that need another pass. Once that rhythm is in your hands, the machine’s job narrows to a few honest qualities: a bowl matched to sensible loads, controls that make short bursts easy, a blade that keeps dry particles circulating, and a pour that does not scatter your work across the counter.
This list therefore runs from a four-cup chopper-grinder built for the job, through the pulse-control compacts, to two fourteen-cup flagships included for the opposite end of the craft — bulk grinding in disciplined passes, where a big bowl used correctly produces a baking week’s flour with an evenness small machines cannot match at volume. If you are deciding which flour to make rather than how to grind it, start with our guide to the Best Food Processors For Nut Flour; this guide assumes the flour is chosen and the nuts are on the counter.
Key Takeaways
- Grinding is rhythm: short pulses, redistribution between bursts, and rests — never one long continuous run.
- Load size is the master variable; a modest load in any of these bowls grinds finer and drier than a full bowl in any of them.
- Cold, completely dry nuts grind best; warmth at any stage is oil release beginning, and oil release is butter beginning.
- Sift after every pass and regrind only the coarse fraction — that loop, not raw power, is what produces even flour.
- Compact grinders suit recipe quantities; the fourteen-cup machines earn their place only when grinding in bulk passes.
- Use the links throughout to check the latest price on Amazon for the grinder that fits your batch scale.
In this guide
Quick Picks
The Elemental leads as the purpose-shaped grinder, the KitchenAid pair bring speed-and-pulse control in two finishes, the tiny BLACK+DECKER handles spoonful-scale grinding, and the two fourteen-cup Cuisinart flagships cover bulk work — included for volume, with the pass discipline their size demands.
| Pick | Badge | Why it earns its place |
|---|---|---|
| Cuisinart Elemental 4-Cup Chopper/Grinder | Best Overall for Grinding | A four-cup chopper-grinder with BladeLock, so the blade stays put when fine flour pours out. |
| KitchenAid 3.5 Cup Food Chopper — Empire Red | Best Pulse Control | Two speeds plus pulse for breaking nuts down fast, then finishing the grind delicately. |
| BLACK+DECKER 1.5-Cup Electric Food Chopper | Best for Tiny Grinding Jobs | A one-touch, one-and-a-half-cup chopper whose only mode is the short burst grinding wants. |
| KitchenAid 3.5 Cup Food Chopper — Contour Silver | Best Dedicated Dry-Grinding Unit | The same pulse-control chopper in silver, framed as a dedicated dry unit that never meets wet work. |
| Cuisinart 14-Cup Food Processor DFP-14BCNY | Best for Large Flour Batches | A fourteen-cup, seven-hundred-twenty-watt flagship for grinding a baking week’s flour in passes. |
| Cuisinart 14-Cup Food Processor FP-1400 | Best Premium for Bulk Grinding | The newer fourteen-cup flagship with a sealed lid that keeps fine flour dust inside the bowl. |
How These Picks Were Chosen
Selection weighed the mechanics of grinding above all: how a design handles dry, light particles that want to fly, settle, and hide from the blade. Bowl scale relative to sensible loads came first, then control granularity — pulse and speed options are the steering wheel of this technique — then blade behaviour on dry loads, then the decanting details that decide whether fine flour ends up in the mixing bowl or across the worktop. Power figures are cited only where listings state them: the big Cuisinart’s seven hundred twenty watts is a listing figure, presented as such.
The two fourteen-cup machines require a word of defence, because they cut against this guide’s small-load gospel. They are here for one legitimate pattern: the baker who grinds in bulk — a week’s almond flour, a café-scale batch of hazelnut meal — and who works in passes, loading modestly, sifting between passes, and using the large bowl as working room rather than as a load target. Used that way, their capacity and sustained character produce volume with evenness. Used as a bucket to fill, they would produce exactly the warm, uneven paste this guide exists to prevent, and the reviews say so.
This is research-led work — specifications and manufacturer descriptions assessed against the established physics of grinding nuts — with no invented bench-test claims. The KitchenAid choppers appear in two finishes on one platform, as in the assignment pool; we treat them as one machine with two roles, everyday and dedicated-dry, rather than inflating them into rivals. For what happens when you deliberately refuse to stop at flour, see our guide to the Best Food Processors For Nutbutter, and for the fresh-batch cooking pattern grinding supports, the Best Food Processors For Pasta Filling guide applies the same make-it-fresh logic to savoury work.
The 6 Best Food Processors for Nut Flour Grinding
Read these reviews as technique assessments: each machine is judged on how its bowl, controls, and blade behave across a grinding session — loads, bursts, sifting passes — and each carries the honest limit that its size or design imposes on that session.

Cuisinart Elemental 4-Cup Chopper/Grinder
Badge: Best Overall for Grinding
Strengths
- Four-cup chopper-grinder format is purpose-shaped for this exact job
- BladeLock secures the SmartPower blade for clean, controlled pouring of fine flour
- Compact bowl keeps a modest load in the blade’s path, grinding evenly
Trade-offs
- Four cups per load; bulk flour means many passes
- Compact motors want rests between hard-nut passes
- No full-size jobs around it — a specialist grinder only
Key specs from the listing: Capacity: 4 cups. Blade: SmartPower with BladeLock safety system. Finish: silver. Model: ECH-4SV.
The Elemental 4-Cup Chopper/Grinder leads a technique-led guide because its design keeps answering the technique’s questions correctly. The bowl is the right scale for a grinding load — four cups, small enough that a modest quantity of nuts stays in the SmartPower blade’s working zone and circulates instead of stratifying. The format is explicitly chopper and grinder, dry work by design. And when the pass is done, BladeLock holds the blade in the bowl while the flour pours, which anyone who has chased a loose blade through a bowl of fine almond flour will recognise as the difference between a clean session and a dusty one.
Across a full session — load, bursts, shake, sift, return the coarse fraction, burst again — it is the machine that asks the least improvisation of the maker. Its limits are the honest compact ones: four cups at a time, rests between passes on hard nuts, and no ambition beyond its specialism. A grinder that knows its job this precisely is the right default for recipe-scale flour, and it is where most readers should start.
Best for: recipe-scale grinding with the cleanest pouring in the list / Not suited for: bulk production in a single load

KitchenAid 3.5 Cup Food Chopper — Empire Red
Badge: Best Pulse Control
Strengths
- Two speeds plus pulse: break down on speed, finish delicately, stop precisely
- Three-and-a-half-cup bowl matches a recipe-scale grinding load
- Dishwasher-safe bowl and cord wrap suit a grinder used several times a week
Trade-offs
- Small loads only; bulk sessions mean repeated batches
- No locking blade, so pour finished flour with care
- Empire Red is a long-term colour commitment on the counter
Key specs from the listing: Capacity: 3.5 cups. Blade: stainless steel multi-purpose. Controls: 2 speeds plus pulse. Care: dishwasher-safe work bowl. Feature: easy cord wrap. Finish: Empire Red. Model: KFC3516ER.
The KitchenAid in Empire Red is the control pick, and grinding is a control discipline. Two speeds plus pulse map directly onto the session’s phases: the higher speed to break whole nuts down through the crumb stage, the lower speed and short pulses to walk the meal down to flour without overshooting into oil release. That final approach — burst, pinch-test, burst — is where flour is won or lost, and a machine that makes delicate bursts easy makes finer, drier flour.
The three-and-a-half-cup bowl sits at recipe scale, the dishwasher-safe parts forgive the dust, and the cord wrap keeps a frequently used tool tidy. There is no locking blade, so decant with the care fine flour always deserves, and bulk work means repeated loads — the flagships at the end of this list exist for that pattern. For a single-recipe grinder who values the stop-exactly-here moment above all, this is the most articulate tool in the compact group.
Best for: makers who grind by feel and want speed-and-pulse finesse / Not suited for: bulk sessions or very large batches
BLACK+DECKER 1.5-Cup Electric Food Chopper
Badge: Best for Tiny Grinding Jobs
Strengths
- One-touch pulse means the machine physically cannot run away into a long grind
- One-and-a-half-cup bowl gathers the smallest loads that bigger bowls lose
- Stay-sharp blade and dishwasher-safe parts keep a tiny tool effortless
Trade-offs
- Tiny quantities only — spoonfuls, not baking days
- One hundred fifty watts suits bursts, not sustained sessions
- No speed range; finesse comes from your pulse timing alone
Key specs from the listing: Capacity: 1.5 cups. Power: 150W. Operation: one-touch pulse. Blade: stay-sharp. Care: dishwasher safe.
The BLACK+DECKER 1.5-Cup makes the technique’s central argument in hardware: it can only pulse. One-touch operation means every run is a short burst by construction — the machine cannot be left churning while your attention wanders, which is precisely the failure mode that turns flour into paste. Its tiny bowl gathers the smallest loads — the handful of hazelnuts for a topping, the spoonfuls of almond for a coating — that larger bowls simply lose, letting them bounce above the blade unground.
One hundred fifty watts, a stay-sharp blade, and dishwasher-safe parts complete a tool with no ambitions beyond its moment, and that is its charm. The boundary is total: baking-day quantities would take it an absurd number of loads, and there is no speed range, so finesse lives entirely in your pulse timing and your pinch test. Keep it at the stove for grind-to-order spoonfuls and it may quietly become the most-used grinder you own; ask it to provision a bakery and it will decline, honestly and immediately.
Best for: spoonful-scale grinding at the moment of cooking / Not suited for: recipe-scale quantities or long sessions

KitchenAid 3.5 Cup Food Chopper — Contour Silver
Badge: Best Dedicated Dry-Grinding Unit
Strengths
- Same two-speed-plus-pulse control as its red sibling, in a quieter finish
- A dedicated dry-only unit keeps flour free of wet-work residue and flavours
- Three-and-a-half-cup scale suits steady, recipe-by-recipe grinding
Trade-offs
- The same machine as the Empire Red pick — a finish and a role, not an upgrade
- Same small-load ceiling as its sibling
- Two units only make sense for genuinely frequent grinders
Key specs from the listing: Capacity: 3.5 cups. Blade: stainless steel multi-purpose. Controls: 2 speeds plus pulse. Care: dishwasher-safe work bowl. Feature: easy cord wrap. Finish: Contour Silver. Model: KFC3516CU.
The Contour Silver KitchenAid is mechanically identical to the Empire Red pick — the same KFC3516 platform, bowl, blade, and two-speed-plus-pulse control — and its place in a grinding guide is about workflow rather than hardware. Grinding is dry work, and dry work is at its best in a dedicated bowl: no moisture, no oil film, no flavour ghosts from wet processing, ever. A silver unit reserved for nuts, seeds, spices, and crumbs starts every session in perfect condition, and in a technique where a trace of oil on the bowl wall can start a batch clumping, that starting condition is a real performance feature.
It also solves the session bottleneck: while one chopper is mid-recipe or in the dishwasher, the dry unit is always ready, and parallel small loads across two compacts move a surprising amount of flour in a session. Most kitchens need one KitchenAid, not two — but a household that grinds several times a week will find the dedicated-dry logic as convincing in practice as it is on this page. Choose the finish you prefer for the primary unit; choose the second when the habit justifies it.
Best for: frequent grinders who want a permanently clean, dry unit / Not suited for: anyone expecting different performance from the red version

Cuisinart 14-Cup Food Processor DFP-14BCNY
Badge: Best for Large Flour Batches
Strengths
- Fourteen-cup bowl gives bulk passes room to circulate and stay even
- Seven-hundred-twenty-watt motor with sustained, proven character for session work
- Stainless steel flagship design with widely available parts and knowledge
Trade-offs
- Its size invites overloading, the single worst grinding error
- A small load rattles in fourteen cups; it needs pass-sized loads to work evenly
- Large and heavy — a permanent counter resident
Key specs from the listing: Capacity: 14 cups. Motor: 720 watts. Jobs named: mincing, dicing, shredding, pureeing, kneading dough. Finish: stainless steel. Model: DFP-14BCNY.
The DFP-14BCNY enters this guide for bulk grinding, and only for bulk grinding done properly. Fourteen cups and a seven-hundred-twenty-watt motor give a baking week’s flour production a home — provided the maker works in passes: a modest load, bursts and redistribution, out through the sieve, the coarse fraction back in, the next load following. The big bowl’s contribution is circulation room at pass scale and the sustained character to keep that rhythm up across a long session without complaint, from a design with a long, well-documented life in home kitchens.
The warnings deserve equal print. Fill this bowl with nuts and run it hopefully, and you will manufacture warm, uneven paste at a scale no compact could manage — size amplifies technique, good or bad. A single recipe’s small load, meanwhile, rattles in fourteen cups and grinds worse than it would in any compact here. This machine is a session tool for serious bakers who grind ahead for the week and store the flour cold; judged on that job, with pass discipline, it is superb, and its dough and processing range makes it the kitchen’s anchor the rest of the week.
Best for: bulk grinding sessions run in disciplined passes / Not suited for: small single loads, which its bowl handles poorly


Cuisinart 14-Cup Food Processor FP-1400
Badge: Best Premium for Bulk Grinding
Strengths
- Fourteen-cup capacity with a leak-proof SealTight lid that contains fine flour dust
- Slicing from one to seven millimetres and shredding cover the rest of a baking day
- Dishwasher-safe parts and in-bowl storage keep a bulk session tidy
Trade-offs
- Premium positioning for a job the compacts do at recipe scale
- Fourteen cups is wasted on single-recipe grinding
- A newer line, so long-term history is still accumulating
Key specs from the listing: Capacity: 14 cups. Lid: leak-proof SealTight design. Slicing: 1–7 mm, plus shredding. Kneads dough. Care: dishwasher-safe parts. Storage: in-bowl. Model: FP-1400.
The FP-1400 is the premium route to the same bulk pattern, with one detail that speaks directly to grinding: its leak-proof SealTight lid. Fine flour dust is mobile — a long session in an unsealed bowl breathes a faint haze of nut dust into the kitchen and coats the rim — and a lid designed to seal contains the work where it belongs. Add fourteen cups of working room, dishwasher-safe parts, and in-bowl storage for its slicing and shredding range, and it is the flagship for a baker whose grinding sessions are part of a larger production day.
The same discipline applies, undiluted: passes, not bucket-loads; sifting between them; flour stored cold the moment the session ends. Its premium positioning buys refinement — the seal, the slicing range from one to seven millimetres, the storage — rather than a different grinding physics, and a recipe-scale grinder will never tax it. Buy it when bulk grinding is one movement in a bigger baking symphony and the whole machine will be used hard all week; buy a compact when grinding is the whole concert.
Best for: bulk sessions within a full baking production day / Not suited for: single-recipe grinding, which wastes its scale
Comparison Table
Compare these six by session pattern: load scale, burst control, and how each design behaves across repeated passes — grinding quality is a session property, not a single-run one.
| Pick | Bowl and format | Blade and controls | Stands out for | Listing |
|---|---|---|---|---|
| Cuisinart Elemental 4-Cup Chopper/Grinder | 4-cup chopper-grinder bowl | SmartPower blade with BladeLock; silver finish | Purpose-built recipe grinding | Check on Amazon |
| KitchenAid 3.5 Cup Food Chopper — Empire Red | 3.5-cup bowl | Stainless blade; 2 speeds plus pulse; cord wrap | Pulse finesse, Empire Red | Check on Amazon |
| BLACK+DECKER 1.5-Cup Electric Food Chopper | 1.5-cup mini bowl | 150W motor; one-touch pulse; stay-sharp blade | Burst-only tiny grinding | Check on Amazon |
| KitchenAid 3.5 Cup Food Chopper — Contour Silver | 3.5-cup bowl | Stainless blade; 2 speeds plus pulse; cord wrap | Dedicated dry unit, silver | Check on Amazon |
| Cuisinart 14-Cup Food Processor DFP-14BCNY | 14-cup full-size bowl | 720W motor; stainless steel flagship design | Bulk passes for the week | Check on Amazon |
| Cuisinart 14-Cup Food Processor FP-1400 | 14-cup full-size bowl | SealTight lid; slicing 1–7 mm; in-bowl storage | Sealed bulk production | Check on Amazon |
How to Choose a Food Processor for Nut Flour Grinding
Decide your session pattern first, because grinding machines divide by session, not by nut. Recipe-scale grinders — a cake’s worth, ground fresh — belong in the compact class, where the bowl matches the load and the load stays in the blade. Session grinders — a week’s flour produced in one sitting — belong with the flagships, used in passes. Spoonful grinders belong with the tiny one-touch chopper. The most common buying error in this category is purchasing for the largest session you can imagine rather than the one you run most weeks; the machine that fits your ordinary Tuesday will grind more flour in its life than the one bought for an annual event.
Control granularity is the specification that matters most after bowl fit. Grinding ends at a moment, and moments are reached by pulses: a speed range for the breakdown phase, a pulse for the finishing phase, and a maker pinch-testing between bursts. When a listing offers two speeds plus pulse, that is not a luxury feature — it is the steering mechanism of the whole technique. Single-action machines can still excel, as the one-touch chopper proves, when their single action happens to be the short burst the job wants; what no flour grinder wants is a design that encourages long, unattended runs.
Blade and bowl behaviour on dry loads is the third test. Dry particles fly, settle, and stratify: coarse pieces migrate, fine flour packs, and a load left unshaken grinds unevenly no matter how long it runs. Designs that recirculate a small load — auto-reversing blades, compact bowls that keep everything near the cutting zone — grind more evenly per burst. Whatever you buy, build the shake-and-scrape pause into your rhythm; no design repeals the physics, the good ones merely cooperate with your pauses better.
Decanting and cleaning close the session, and they are not trivial. Fine flour plus a loose blade is a small daily hazard and a recurring mess; a locking blade removes both. Flour dust in seals and lids argues for dishwasher-safe parts. And a dedicated dry unit — the second-chopper logic in this guide — removes the moisture and oil contamination that quietly ruins delicate grinds. These details decide whether grinding three times a week feels like a craft or a chore, and crafts survive while chores get abandoned.
Finally, respect the heat budget as a buying criterion. Sustained grinding warms any motor and any load; compact motors want rests between passes, flagships want loads that justify their scale, and every machine wants nuts that started cold and dry. If your practice is raw, oily nuts in quantity — the hardest grinding brief there is — buy toward sustained character and bowl room, and plan your sessions in passes with the freezer as part of the equipment: a brief chill between passes resets a warming batch completely. The same respect for ingredient temperature runs through our guide to the Best Food Processors For Pureeing Food, where cold, staged work protects texture in the wet direction too.
The Grinding Session: A Step-by-Step Technique
This is the expanded how-to at the heart of this guide: a complete grinding session, from whole nuts to stored flour, written to be followed with any machine in the list. Read it once fully before your first session. The rhythm — burst, redistribute, test, sift — will feel deliberate the first time and automatic by the third, and it transfers unchanged to every nut, seed, and batch size you will ever grind.
Set up before the first nut moves: sieve and bowl beside the machine, a tray for finished flour, jars or containers ready, nuts weighed and chilled if oily. Grinding punishes mid-session improvisation, because the critical moments arrive in seconds; a prepared bench means your attention stays on the texture, which is where it belongs.
- Prepare the nuts: completely dry, cooled or briefly chilled if oily, skins on or off as the recipe requires.
- Load modestly — a layer that moves freely in the bowl, whatever the bowl’s size; never a packed bowl.
- Break down: run short bursts on the higher setting where you have one, until the nuts reach coarse crumbs.
- Redistribute: stop, shake the bowl or scrape the walls and lid, returning settled flour and stray pieces to the centre.
- Finish: pulse in the shortest bursts, pinch-testing between them, until the meal turns fine, dry, and powdery.
- Sift: tip the batch through a sieve; flour passes, coarse pieces remain — return only the coarse pieces for another pass.
- Repeat the sift-and-return loop until the whole load has passed, rather than grinding the finished flour further.
- Rest the batch if it warms or threatens to clump: ten minutes in the fridge resets it completely.
- Store at once: airtight, in the fridge, labelled with the nut and the date.
- Clean the bowl and blade promptly; dry parts fully before the next dry session.
Two judgement skills carry the whole technique, and both are learned by touch. The pinch test: flour rubbed between finger and thumb should feel silky-dry, with no greasy smear and no grit beyond the grade you intend. The sound test: a grinding load changes voice as it refines — loud and rattling at the crumb stage, quieter and hushed at flour — and a load that suddenly sounds laboured or thumps is clumping and asking you to stop. Eyes, fingers, and ears, in that order, will tell you more than any timer.
Grade your output deliberately. Not every pass needs to reach the finest flour: stop a portion early for a coarse meal, sift the rest fine for baking, and one load becomes two ingredients. That grading habit — impossible with a bought bag — is the deepest reason to grind your own, and it is explored from the ingredient side in our flour guide and from the whole-food side in our coverage of the Best Food Processors For Potatoes, where a staple is processed fresh, to order, in exactly the form the meal requires.
Troubleshooting
Problem: Flour turned glossy and clumped mid-session → heat and oil release caught up with the batch → stop immediately, spread it on a tray to cool, fridge it briefly, and finish with the shortest pulses; next session, chill the nuts and shorten the bursts.
Problem: Coarse pieces survive pass after pass → they are being diluted by finished flour and escaping the blade → sift them out and grind the coarse fraction alone, in a smaller load, where every piece must meet the blade.
Problem: Flour dust coats the kitchen after every session → the bowl is being opened hot and full, or the lid seal is poor → let the dust settle for a minute before opening, open away from you, and consider a sealed-lid design like the FP-1400 for bulk work.
Grinding Different Nuts: A Field Guide to Behaviour
Almonds are the reference grind: moderately oily, cooperative, and the nut against which to learn the session rhythm. Hazelnuts carry noticeably more oil and reward every precaution — cold nuts, short bursts, early sifting — and their flour is correspondingly rich and quick to tip. Cashews are soft and grind fast, asking restraint rather than effort; overshooting is their risk. Walnuts and pecans are the delicate pair, oily and fragile, best ground in the smallest, coldest loads. Pistachios behave like almonds with better colour. Seeds — sunflower, pumpkin — grind like forgiving nuts and take the same rhythm without complaint.
The unifying rule is that oil content sets the difficulty, and difficulty sets the load size and burst length, never the other way round. When you meet a new nut, prototype it: a tiny load in the smallest bowl, bursts counted, texture noted. That prototype habit — cheap, quick, written down — turns grinding from a gamble into a repertoire, and it is why the tiny chopper in this list earns its place beside flagships costing many times its tier.
Grinding Ahead vs Grinding Fresh: Planning Your Flour Supply
Ground nuts stale from the moment they are ground, because grinding exposes their oils to air across an enormous new surface area. That single fact should organise your supply. Flour for delicate baking wants to be hours old; flour for hearty, strongly flavoured bakes tolerates days in the fridge; no homemade flour wants to be weeks old at room temperature. Grinding ahead is therefore a refrigeration strategy, not a cupboard one: sealed jars, cold storage, dates on lids, oldest used first.
The machines divide naturally along that line. Compacts make grinding fresh so fast that storing flour becomes almost unnecessary — the recipe-scale answer. Flagships make a bulk session efficient for households whose baking volume genuinely outruns daily grinding — the production answer. Neither is superior in the abstract; the honest question is which pattern your kitchen actually lives. Our guide to the Best Food Processors For Paleo kitchens treats that same freshness-first planning as the foundation of the whole way of cooking.
Calibrating Your Machine: The First Three Sessions
Every grinder in this guide has a personality — a burst length it likes, a load size where it sings, a voice it makes when the flour is done — and the fastest way to learn yours is to treat the first three sessions as calibration rather than production. Session one: a modest load of almonds, bursts counted aloud, a pinch test at every pause, notes taken. Session two: the same nut, one variable changed — a smaller load, or colder nuts — and the difference observed. Session three: a different nut entirely, approached with the rhythm the first two sessions taught. By the end of the third session you will know your machine’s working load, its comfortable burst length, and its sound at flour, and those three facts are worth more than any specification printed on its box.
Write the calibration down where you keep recipes: machine, nut, load, bursts, result. It feels excessive for exactly one week, after which it becomes the most-consulted page in your baking notes, because it converts every future session from an experiment into a repetition. Grinders reward this professionalism disproportionately — the gap between a calibrated maker and a hopeful one is the entire gap between flour and paste, and it closes in three sessions.
Calibration has one more dividend worth naming: it teaches you when not to grind. A maker who knows their machine hears the wrong sound in the first burst — the load too big, the nuts too warm, the bowl not quite dry — and stops to correct it before any harm is done, where an uncalibrated maker pushes on and manufactures a problem that takes ten minutes to rescue. That early stop is the mark of the whole technique in miniature. Grinding well is not a matter of processing longer or harder; it is a matter of noticing sooner. Three honest calibration sessions build exactly that noticing, and every batch afterwards is quieter, cleaner, and more predictable because of them.
From Grinding to Baking: Handling Fresh Flour Well
Fresh flour behaves slightly differently from the bagged kind, and two small adjustments honour the difference. First, weigh it rather than scooping where a recipe allows: home-ground flour’s density varies with its fineness and the nut’s oiliness, and a scale removes that variable from the bake entirely. Second, let it come to room temperature before it meets a batter, especially from fridge storage — cold flour can tighten a delicate mixture and throw off a recipe’s timing in ways that get blamed on the oven. Sift it once more at the point of use if it has sat for more than a day, because even cold, dry flour settles and compacts in its jar.
Handled that way, fresh flour’s advantages arrive intact in the finished bake: the nut’s flavour present rather than remembered, the crumb’s texture set by a grind you chose for this recipe rather than one chosen for a supply chain. That arrival — flavour, texture, intention — is the destination the whole grinding session was aimed at, and it is why the technique in this guide is worth its few minutes of attention every single time.
Common Buying Mistakes
The cardinal grinding mistake is the packed bowl and the long run — maximum load, maximum time, minimum attention. It manufactures the exact failure this guide exists to prevent: paste at the centre, gravel at the edges, a warm motor, and a batch that is neither flour nor butter. Every element of the session method is the negation of that one instinct.
Second, grinding the finished flour along with the coarse fraction, pass after pass, because separating them felt like fuss. Finished flour re-ground is flour being pushed toward butter for no benefit. The sieve is not an accessory to the technique; it is half of the technique. Sift early, sift every pass, and let only the stubborn pieces meet the blade again.
Third, warm ingredients at any point — nuts from a warm oven, a bowl from a hot dishwasher, a batch ground in a sunlit kitchen at the height of summer. Oil release is a temperature story as much as a time story. Cold nuts, a cool dry bowl, and a fridge rest for any batch that starts to shine will save more flour than any upgrade of machine.
Finally, storing the results like a pantry staple and wondering, weeks later, why the cake tasted tired. You ground your own flour for freshness; honour the reason. Small jars, cold storage, dates on lids, and a preference for grinding to order whenever the session takes only minutes — which, with the rhythm learned, it does.
Final Recommendation
Choose the grinder that fits your session pattern — compact for recipe-scale freshness, flagship for disciplined bulk passes, tiny chopper for spoonfuls — and then let technique do what technique does. The machine’s contribution is real but bounded: bowl fit, burst control, a clean pour. The rest is rhythm, and rhythm is free.
Start with the Cuisinart Elemental 4-Cup Chopper/Grinder if you want the safest all-round choice from this list. Its four-cup bowl is the load size grinding wants, its grinder brief is the job itself, and BladeLock finishes every pass the way every pass should finish — flour in the bowl, blade in the machine, nothing on the floor. For the great majority of home grinders, this is the complete answer.
If that first choice does not fit your kitchen, the KitchenAid 3.5 Cup Food Chopper — Contour Silver is the alternative we would look at next. The KitchenAid pair serve the control-minded and the dedicated-dry workflows, the little BLACK+DECKER owns the spoonful scale outright, and the two Cuisinart flagships reward the serious bulk baker who works in passes and stores cold. Whichever you choose, grind cold, grind small, sift always — and stop at flour.
Frequently Asked Questions
What is the difference between nut flour and nut meal?
Fineness and uniformity. Meal is the coarser, less sifted grind — welcome in rustic bakes, toppings, and coatings. Flour is the fine, sifted grade that delicate baking requires. A processor makes both from the same load: stop early for meal, or run the full sift-and-return loop for flour, and grade a single batch into both.
How long should each grinding burst be?
Short — a few seconds at a time, with redistribution and a pinch test between bursts. The breakdown stage tolerates slightly longer runs; the finishing stage, where flour can tip into paste, wants the shortest pulses you can manage. If you are counting long seconds, the burst is too long.
Why do my nuts turn to butter before they turn to flour?
Heat, load, or time — usually all three together. Warm or oily nuts, a packed bowl, and continuous running release oils before the grind evens out. Chill the nuts, halve the load, pulse instead of running, and sift out finished flour so it is not ground further. The failure is a rhythm problem, and rhythm problems have rhythm solutions.
Can I grind seeds the same way as nuts?
Yes — sunflower and pumpkin seeds follow the same session pattern and are generally more forgiving, releasing their oils on a similar schedule to mid-oil nuts. Flax and chia are the exceptions in behaviour, forming gels with moisture, so keep them bone dry and grind them in the smallest, driest loads, ideally in a dedicated dry unit.
Is a big processor better for grinding flour?
Only for bulk sessions run in passes. A large bowl used with modest loads gives circulation room and session stamina; the same bowl filled hopefully gives the worst results in this guide. For recipe-scale grinding, a compact bowl that matches the load will out-grind a flagship every time, because the load stays in the blade’s path.
How do I get commercially fine flour at home?
Accept one extra loop: grind, sift, regrind the coarse fraction alone, sift again, and combine. Two disciplined loops bring processor flour close to commercial fineness for most baking. Delicate patisserie at the highest level may still notice a difference — for everything else, freshness beats the last degree of fineness.