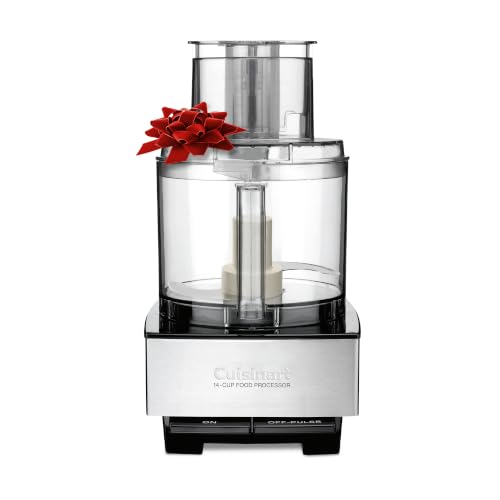
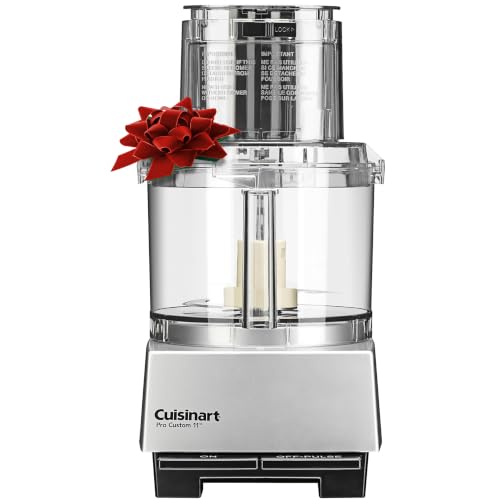
Disclosure: topratedkitchenware.com is reader-supported. When you buy through links on our site, we may earn an affiliate commission from Amazon and other retailers, at no extra cost to you.
Where to buy
If you are shopping for the best food processors for pasta filling, the six picks below are the shortlist this guide is built around. Pasta filling is precision work disguised as simple work: ricotta that must stay light, spinach that must be chopped fine without turning to juice, meat that must be minced evenly, and herb mixtures that must distribute through every bite. The six machines below are sized and specced for exactly that work, from family ravioli sessions down to a single batch of tortelloni filling.
- Cuisinart Mini Food Processor 3-Cup — Best for Small Filling Batches · Check on Amazon
- Hamilton Beach 10-Cup Food Processor — Best for Family Ravioli Sessions
- BLACK+DECKER 8-Cup Food Processor — Best Mid-Size for Meat Fillings
- Cuisinart Core Custom 4-Cup Mini Chopper — Best for Soft Cheese Fillings
- Cuisinart Elemental 4-Cup Chopper/Grinder — Best for Pourable Fillings
- KitchenAid 3.5 Cup Food Chopper (Empire Red) — Best Pulse Control for Greens
Read the full guide ↓
Anyone hunting for the best food processors for pasta filling already knows the real problem: filling is where handmade pasta succeeds or fails. Dough gets the glory, but a watery spinach filling bursts ravioli in the pot, a coarse meat filling tears delicate sheets, and an under-seasoned ricotta mixture makes beautiful shapes taste of nothing. The food processor is the tool that controls all three risks, chopping greens fine and dry, mincing meats evenly, and folding herbs, cheese and seasoning through a base in seconds.
The workload is distinctive. Most fillings are small to medium batches, often just a few cups, which is why this guide is led by mini and mid-size machines rather than the biggest bowls in the category. What matters is control: short pulses that chop without pureeing when you want texture, sustained running when you want a silk-smooth mousse filling, and a bowl that lets you scrape every bit of an expensive mixture out without waste. Blade behavior at low volume matters more here than raw capacity.
Every pick below is a blade machine, because filling is blade work; no discs are required, and all six are linked with listing photos. The reviews judge each one on filling-specific grounds: how it handles leafy greens, how evenly it minces, how it treats ricotta and soft cheeses, and how completely the bowl empties. If your pasta ambitions run to dough as well as filling, note that none of these minis is a dough machine; filling is their craft, and they are judged on it alone.
A note on scale before the picks: the quantities in most filling recipes are written for the bowl sizes that lead this guide. When a recipe doubles, resist the urge to double the load in a mini; make two batches instead, or step up to the mid-size picks, because an overloaded mini chops unevenly and warms its mixture, and filling punishes both faults in the finished pasta. The same respect-the-load principle governs the vegetable work in Best Food Processors For Ricing Veggies, where small, even loads are likewise the difference between a clean cut and a crushed one.
Key Takeaways
- Filling is blade work in small batches, so control and pulse behavior matter more than bowl size.
- Greens must be chopped fine and kept dry; squeeze them before processing and again after if needed.
- Ricotta fillings need folding, not whipping: brief pulses keep them light instead of dense.
- Mini and 4-cup machines match most filling quantities and empty more completely than big bowls.
- Season the filling slightly boldly; pasta dough dilutes the flavor of every bite.
- Chill finished fillings before shaping; cold filling pipes and spoons cleanly and bursts less in the pot.
In this guide
Quick Picks
This is a small-batch roundup by design. The 10 and 8-cup machines anchor the family-session end; the minis handle the weeknight tortelloni end, where most filling is actually made.
| Product | Badge | Why it is here | Amazon |
|---|---|---|---|
| Cuisinart Mini Food Processor 3-Cup | Best for Small Filling Batches | Chop and grind modes in a 24 oz bowl sized to real filling batches. | Check on Amazon |
| Hamilton Beach 10-Cup Food Processor | Best for Family Ravioli Sessions | The session machine: 10 cups, mincing and puree, scraper included. | Check on Amazon |
| BLACK+DECKER 8-Cup Food Processor | Best Mid-Size for Meat Fillings | Stated 450W behind mince and grind functions, 8-cup bowl. | Check on Amazon |
| Cuisinart Core Custom 4-Cup Mini Chopper | Best for Soft Cheese Fillings | The ricotta specialist: 4 cups, auto-reversing blade, easy cleanup. | Check on Amazon |
| Cuisinart Elemental 4-Cup Chopper/Grinder | Best for Pourable Fillings | BladeLock pouring for soft fillings, in a 4-cup bowl. | Check on Amazon |
| KitchenAid 3.5 Cup Food Chopper (Empire Red) | Best Pulse Control for Greens | Named pulse control for greens, in a compact 3.5-cup bowl. | Check on Amazon |
How These Picks Were Chosen
Picks were chosen from verified listings for the qualities filling work tests: blade design, pulse control where a listing names it, bowl sizes matched to real filling quantities, and ease of emptying and cleaning, since filling ingredients are costly and sticky. Listings were checked on 2026-11-20, and every specification quoted here comes from the listing itself. Machines were not required to have discs, because no classic filling uses one; they were required to chop, mince, grind or puree credibly, as their listings describe.
This is a research-led guide with no hands-on testing claims. Each review reasons from the listed design to the filling task: a reversible blade that grinds as well as chops suits spiced meat fillings; a two-speed-plus-pulse control suits the stop-and-check rhythm of greens; a BladeLock system suits bowls of soft filling that must be poured, not scooped around a loose blade.
All six picks are linked. The set deliberately spans 10 cups down to 3.5 cups, because filling quantities do. A household making ravioli for twelve needs the top of this list; a cook making a single batch of agnolotti for two is better served near the bottom, and this guide says so in each review rather than pretending one size fits the whole craft.
The 6 Best Food Processors for Pasta Filling
Each review below is judged on filling work specifically: greens, minced fillings, soft cheese bases, seasoning distribution, and how completely the bowl gives up its contents.

Cuisinart Mini Food Processor 3-Cup
Badge: Best for Small Filling Batches
Strengths
- Reversible blade offers a chop mode for greens and a grind mode for firmer mixtures
- 24 oz bowl matches a single batch of filling with little waste
- Auto-reversing action reduces the need to stop and stir small mixtures
Trade-offs
- 3-cup ceiling means family ravioli sessions need multiple batches
- No pulse control named in the listing beyond its two modes
- Brushed chrome housing shows flour dust readily
Key specs (from the listing)
- Capacity: 3-cup (24 oz)
- Blade: reversible, auto-reversing SmartPower blade
- Modes named in the listing: chop and grind
- Finish: brushed chrome
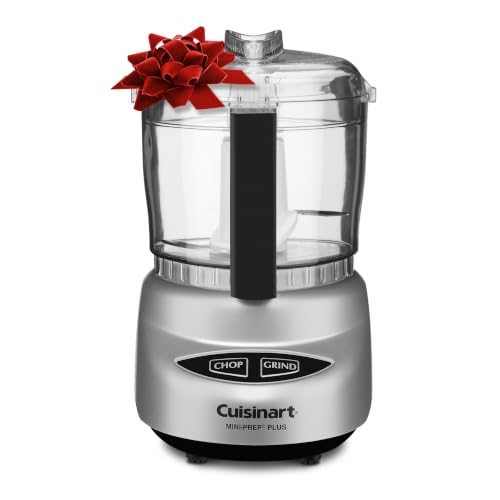
The Cuisinart Mini Food Processor is a 3-cup, 24 oz chopper whose reversible SmartPower blade chops in one direction and grinds in the other, automatically reversing between modes. For pasta filling, that two-character blade is a thoughtful match: the chop side reduces spinach, chard and herbs to a fine, even cut, while the grind side handles firmer work such as minced mushroom, walnut and herb mixtures or a small quantity of seasoned meat. The bowl is sized to the reality of filling, which is usually measured in cups, not quarts.
Use it the way filling wants to be made: greens first, squeezed dry, chopped in short runs and scraped once; then the base, ricotta or meat, with seasoning folded through in brief pulses. The small bowl empties almost completely, which matters when the filling holds real pecorino or prosciutto. Its limit is session scale. A ravioli afternoon for a crowd means three or four consecutive batches, each fine in itself, but the cook who does that monthly should step up to the 8 or 10-cup picks below and keep this mini for weeknight quantities.
One more virtue for this particular job: the mini is easy to chill. Filling handles best cold, and a small bowl of finished spinach-ricotta can go straight into the refrigerator in its own bowl, then come back out for piping or spooning without a transfer. Small efficiencies like that are why experienced pasta makers keep a mini within reach even when a large machine lives in the same kitchen.
Best for: single batches of any classic filling for two to four servings of pasta / Not suited for: marathon family ravioli sessions, which outgrow a 3-cup bowl quickly

Hamilton Beach 10-Cup Food Processor
Badge: Best for Family Ravioli Sessions
Strengths
- 10-cup bowl carries a full family batch of filling in one load
- Listing names mincing and puree, the two ends of the filling spectrum
- Included bowl scraper recovers sticky filling from the walls
Trade-offs
- Large bowl is harder to empty completely than a mini
- Oversized for a two-person tortelloni batch
- Listing states no wattage figure
Key specs (from the listing)
- Capacity: 10 cups
- Functions named in the listing: slicing, shredding, mincing and puree
- Accessory named in the listing: easy-clean bowl scraper
- Finish: stainless steel
- Model: 70730
The Hamilton Beach 70730 is a 10-cup processor whose listing names slicing, shredding, mincing and puree, with an easy-clean bowl scraper and a stainless steel finish. In this guide its discs are supporting actors; the filling case rests on mincing and puree in a bowl big enough for a family batch. A holiday ravioli session can call for six or more cups of filling, and making it in one consistent load, seasoned once and mixed evenly, beats three mini batches that each taste slightly different.
The bowl scraper is the quiet hero here. Filling clings: ricotta smears, spinach mats, meat mixtures paste themselves to the walls above the blade line. The shaped scraper clears the bowl in a pass, returning that material to the mixture and, at the end, recovering nearly all of an expensive filling for the piping bag. For puree-style fillings, a smooth butternut squash or a silky chicken mousse, the 10-cup bowl gives the mass room to circulate rather than pack. This is the session machine of the roundup.
Plan the session around it: make the full batch of filling first, transfer it to a piping bag or covered bowl to chill, and let the processor move on to a sauce while the pasta rests. Filling made ahead and chilled is easier to portion, less likely to wet the dough during shaping, and more forgiving of a slow, social shaping table where ravioli are assembled at conversation speed.
Best for: family and holiday ravioli sessions needing one large, consistent batch / Not suited for: tiny two-person batches, which rattle in a 10-cup bowl

BLACK+DECKER 8-Cup Food Processor
Badge: Best Mid-Size for Meat Fillings
Strengths
- 450W power stated in the listing, useful for firm meat mixtures
- Grind and mince named among its attachments and functions
- 8-cup bowl splits the difference between session and weeknight sizes
Trade-offs
- Mid-size bowl still needs batching for the largest gatherings
- Disc attachments are extras filling work rarely uses
- Stainless blade is shared across all its many jobs
Key specs (from the listing)
- Capacity: 8-cup
- Power named in the listing: 450W
- Blade: stainless steel
- Attachments named in the listing: shred, slice, mince, grind and puree
The BLACK+DECKER 8-Cup Food Processor lists 450W of power, a stainless steel blade, and attachments to shred, slice, mince, grind and puree. For filling, the operative words are mince and grind with a stated power figure behind them. Meat fillings, whether a classic pork and veal mixture, a chicken and herb filling, or a firm mushroom and walnut base for a vegetarian ravioli, need a machine that keeps cutting evenly instead of smearing fat or mashing the mixture into paste, and an 8-cup bowl holds a generous batch while keeping the mass close to the blade.
Technique with meat fillings is temperature and restraint. Keep the meat cold, cut it into even small pieces, and process in short runs, checking the texture between them; the goal is an even, fine mince that still has definition, not a sausage emulsion, unless a mousse filling is what you intend. The stated power helps the blade start each run decisively in a cold, firm load. Vegetarian cooks get the same benefit with mushroom and nut mixtures, which are nearly as dense as meat and just as unforgiving of a weak start.
This is also the natural pick for cooks whose filling repertoire includes filled pastas from several traditions: agnolotti-style meat fillings, spinach and cheese, squash, and the spiced fillings of dumpling-adjacent dishes that pass through a pasta kitchen. One mid-size machine with grind and mince in its listing covers that whole map without asking a mini to marathon or a 10-cup bowl to handle a two-cup batch gracefully.
Best for: meat and firm vegetarian fillings in generous mid-size batches / Not suited for: the smallest single-serving filling experiments

Cuisinart Core Custom 4-Cup Mini Chopper
Badge: Best for Soft Cheese Fillings
Strengths
- 4-cup bowl is the natural size for a ricotta-based batch
- Auto-reversing blade folds seasoning through soft bases evenly
- Dishwasher-safe parts after sticky cheese cleanup
Trade-offs
- No grind mode named beyond chops and grinds in the listing headline
- 4-cup ceiling for large family sessions
- White finish can stain with tomato or saffron fillings
Key specs (from the listing)
- Capacity: 4-cup mini bowl
- Blade: auto-reversing stainless steel SmartPower blade
- Functions named in the listing: chops and grinds
- Parts: dishwasher-safe
- Model: MCH-4
- Finish: white and stainless steel
The Cuisinart Core Custom 4-Cup Mini Chopper, the MCH-4, chops and grinds with an auto-reversing stainless steel SmartPower blade and offers dishwasher-safe parts in a white and stainless finish. Four cups is the quiet sweet spot for cheese fillings: a standard ricotta batch with its egg, cheese, lemon zest and herbs lands right in this bowl, with headroom to fold without slopping. The auto-reversing blade changes direction between modes, which helps distribute fine seasoning through a soft base without a separate stirring step.
Ricotta filling fails by density. Overworked, it turns heavy and weeps in the pot; undermixed, it pockets seasoning and bursts with bland bites. The rhythm in this bowl is brief pulses, scrape once, taste, adjust. Because the bowl is small, a cook can season iteratively with confidence, and the whole batch chills quickly and evenly. Spinach for a combined filling should be chopped separately and squeezed hard before it meets the cheese, a rule this machine enforces happily by making the greens step a two-minute job.
Herb handling is a small delight here: parsley, basil or marjoram for a filling need to be cut fine without being bruised into a dark puree, and short pulses in a 4-cup bowl with the other dry ingredients, before the ricotta goes in, gives exactly that result. Build the dry flavor base first, then fold the cheese through it, and the filling tastes seasoned all the way through rather than salted on the surface.
Best for: ricotta and soft-cheese fillings in standard home quantities / Not suited for: very large sessions, which belong to the 8 and 10-cup picks

Cuisinart Elemental 4-Cup Chopper/Grinder
Badge: Best for Pourable Fillings
Strengths
- BladeLock system secures the blade for pouring, ideal for soft fillings
- 4-cup capacity matches standard filling batches
- SmartPower blade handles chopping and grinding in one design
Trade-offs
- Silver finish shows every splash of a colorful filling
- No pulse program named in the listing
- Same 4-cup session ceiling as the other minis
Key specs (from the listing)
- Capacity: 4-cup
- Blade: SmartPower blade
- Safety detail named in the listing: BladeLock system secures the blade for pouring
- Finish: silver
- Model: ECH-4SV
The Cuisinart Elemental 4-Cup Chopper/Grinder, the ECH-4SV, pairs a SmartPower blade with a BladeLock safety system that secures the blade for easy pouring, in a 4-cup silver bowl. That locking detail sounds minor until you have tried to pour a soft filling, a smooth squash puree or a loose cheese mixture, out of a bowl while a loose blade slides toward the lip. For filling work, where mixtures are often transferred to piping bags and every spoonful counts, a blade that stays put is a genuine functional advantage, not a gimmick.
Choose this one if your fillings run soft: butternut and mascarpone, whipped ricotta variations, smooth mushroom purees, or the silky fillings of tortelloni in brodo. The pour spout transfer keeps the mixture’s texture intact, where scooping and scraping can deflate a light filling. Its chopping is equally serviceable for the greens stage. The honest limit is the same as every mini here: it is a batch-size tool, and a banquet of ravioli will have it running batch after batch while the bigger bowls finish in one load.
The BladeLock design also changes cleanup behavior in a way filling cooks appreciate: with the blade secured, the bowl can be rinsed and the remaining filling swirled out with a little warm water rather than fished around a loose blade with fingertips. Soft, fatty fillings are the messiest in the repertoire, and small design choices that keep hands away from blade edges get used with gratitude every single session.
Best for: soft, pourable fillings transferred to piping bags / Not suited for: bulk sessions for a crowd

KitchenAid 3.5 Cup Food Chopper (Empire Red)
Badge: Best Pulse Control for Greens
Strengths
- 2 speeds plus pulse named in the listing, the control greens want
- Stainless steel multi-purpose blade for chopping and pureeing
- Dishwasher-safe bowl and easy cord wrap for tidy storage
Trade-offs
- 3.5-cup bowl is the second smallest in this roundup
- Empire Red is a color commitment on the counter
- No grind-specific mode named in the listing
Key specs (from the listing)
- Capacity: 3.5 cup
- Blade: stainless steel multi-purpose blade
- Controls named in the listing: 2 speeds plus pulse
- Work bowl: dishwasher-safe
- Storage detail named in the listing: easy cord wrap
- Model: KFC3516ER
- Color: Empire Red
The KitchenAid 3.5 Cup Food Chopper, model KFC3516ER in Empire Red, lists a dishwasher-safe work bowl, a stainless steel multi-purpose blade, 2 speeds plus pulse, and an easy cord wrap. The control layout is the story for filling: pulse is the difference between spinach chopped fine and spinach liquefied, and this is the pick in the roundup whose listing names pulse explicitly alongside two working speeds. A 3.5-cup bowl suits the single-batch cook, and the low speed gives a gentler option for folding soft mixtures.
Greens technique defines this machine’s role. Load squeezed spinach or chard in modest handfuls, pulse in ones and twos, and check constantly; the moment the cut looks even, stop, because the next pulse is where juice begins. That juice is the enemy: wet filling softens dough and bursts seams. Working in this small bowl makes the discipline easy, since each load is small enough to judge at a glance. The same pulse control serves herb-heavy fillings and the final folding of seasoning through ricotta on the low speed.
There is a storage argument too: the cord wrap and compact bowl make this the pick most likely to live where filling is actually made, on the counter rather than in a deep cupboard. Pasta making is a tactile, flour-dusted process, and the tools that get used are the ones within reach when the dough is already rolled. A chopper that appears in seconds and rinses in seconds fits the rhythm of a pasta evening better than a larger machine that must be fetched and assembled.
Best for: greens-heavy fillings where pulse control protects texture / Not suited for: large family batches, which exceed a 3.5-cup bowl
Comparison Table
Read this table by batch size first. Filling quantities are unforgiving: too big a bowl wastes mixture on the walls, too small a bowl multiplies batches. The control column tells you how each machine manages the stop-and-check rhythm filling demands.
| Product | Capacity | Standout for this job | Amazon |
|---|---|---|---|
| Cuisinart Mini Food Processor 3-Cup | 3-cup (24 oz) | Two-mode reversible blade for greens and firmer fillings | Check on Amazon |
| Hamilton Beach 10-Cup Food Processor | 10 cups | Largest bowl here, with scraper for sticky fillings | Check on Amazon |
| BLACK+DECKER 8-Cup Food Processor | 8-cup | Stated power for firm meat and nut mixtures | Check on Amazon |
| Cuisinart Core Custom 4-Cup Mini Chopper | 4-cup mini bowl | Sweet-spot size for cheese-based fillings | Check on Amazon |
| Cuisinart Elemental 4-Cup Chopper/Grinder | 4-cup | Blade stays locked when pouring soft mixtures | Check on Amazon |
| KitchenAid 3.5 Cup Food Chopper (Empire Red) | 3.5 cup | Explicit 2 speeds plus pulse in the listing | Check on Amazon |
How to Choose a Food Processor for Pasta Filling
Size the bowl to the filling, not the feast
A standard home filling batch runs from two to six cups. Two cups fills a 3.5 or 4-cup mini perfectly; six cups wants the 8 or 10-cup bowls. The failure mode of an oversized bowl is waste and unevenness: a thin layer of filling smears across a wide base, chops unevenly, and leaves a costly residue on walls the blade never reaches. The failure mode of an undersized bowl is tedium and warming, as batch follows batch and the first ones sit out while the last are made.
Be honest about your real sessions. If most of your pasta making is a weeknight batch for two to four, the minis in this guide are not a compromise; they are the correct tool, and the money and space saved are real. If your identity as a cook includes a December ravioli marathon for the extended family, weight the top of the list and keep a mini for the rest of the year.
Pulse control is the texture control
Fillings live on a texture spectrum from coarse and rustic to silk-smooth, and the machine’s controls decide where you land. A named pulse function, like the KitchenAid’s 2 speeds plus pulse, lets you approach a texture in steps and stop exactly at it. Two-mode blades, chop and grind, give a coarser kind of control: choose the mode that matches the ingredient, greens to chop, firm mixtures to grind, and process in short runs.
Whatever the controls, build the habit of stopping early and checking. Filling can always be processed one pulse further; it can never be processed one pulse back. Tasting as you go matters doubly, because the processor distributes seasoning so efficiently that an over-salted filling announces itself in every single raviolo.
The dry-greens discipline
More fillings fail from water than from any other cause. Spinach, chard, kale and nettles all carry water that cooking releases and chopping releases further. The discipline is threefold: cook or wilt the greens, squeeze them hard in a towel until almost no moisture emerges, then chop, and if the chopped greens still weep, squeeze once more. A processor makes the chopping instant; it cannot remove water, and no machine choice excuses skipping the towel.
The same discipline applies in miniature to other wet ingredients: roasted peppers should be drained, fresh mozzarella torn and drained, ricotta drained in a sieve if it looks loose. A filling that goes into the dough dry-ish and well seasoned comes out of the pot intact, which is the whole point of the exercise. Related texture thinking appears in Best Food Processors For Pureeing, where managing liquid is equally central.
Emptying, chilling and the piping bag
Judge a filling machine partly by how it gives up its contents. Shaped scrapers, pouring designs like the BladeLock system, and small bowls all recover more of an expensive mixture than a wide bowl and a loose blade. Transfer the finished filling to a piping bag or a covered bowl and chill it before shaping: cold filling portions cleanly, wets the dough less, and holds its seasoning distribution. Warm, loose filling is the other great burster of ravioli, after water.
If filled pasta is part of a wider homemade repertoire, the sauce that meets it often comes from the same class of machine; the small-batch puree logic in Best Food Processors For Pureeing Food applies directly to the smooth tomato and butter-based sauces that dress filled pasta.
How to Make Pasta Filling in a Food Processor
The sequence below builds a classic spinach and ricotta filling, but the order of operations generalizes to almost any filling: dry components and greens first, base second, seasoning folded through last, then a proper chill before a single raviolo is shaped.
- Drain the ricotta in a fine sieve if it looks wet, and wilt the spinach, then squeeze it in a clean towel until it is as dry as you can make it.
- Pulse the dry flavor base first: grated hard cheese, lemon zest, herbs and any nuts, until evenly combined.
- Add the squeezed greens and pulse in short bursts until finely and evenly chopped, stopping before any juice appears.
- Add the ricotta and egg, and pulse only until the mixture comes together, scraping the bowl once midway.
- Taste and adjust salt, pepper and nutmeg, remembering the dough will dilute the seasoning slightly.
- For meat fillings, substitute cold, small pieces of meat for the greens step and process in short runs to an even mince, keeping the mixture cold throughout.
- Transfer the filling to a piping bag or covered bowl and refrigerate for at least half an hour before shaping.
- Keep the filling chilled as you work, returning it to the refrigerator during any pause in shaping.
Two shaping-day habits protect all this work. First, portion filling small and consistent: oversized mounds are the ones that burst, however good the filling is. Second, keep the dough covered and the shaped pasta on a semolina-dusted tray, and cook a single test raviolo before shaping the whole batch; the test piece tells you about seasoning, texture and seal in ninety seconds, while changes are still possible.
Leftover filling keeps a few days refrigerated and freezes well in a piping bag or a small container. It also has honorable second lives: folded through scrambled eggs, spread on crostini, or stirred into a soup. A cook who makes filling in the right quantity for the pasta, plus a little extra on purpose, is never sorry.
Finally, treat the piping bag as part of the processor system rather than an afterthought. A filling at the right consistency should hold a soft peak when the bag is lifted, portion in clean, equal mounds, and stay where it is placed while the dough is folded and sealed. If it slumps, chill it longer; if it will not move through the bag, it is too stiff with cheese or crumb and wants a spoonful of its own cooking liquid or a brief rest at room temperature. Getting that consistency right at the bowl stage is what makes a table of shaped pasta look uniform.
Troubleshooting
Problem: The filling is wet and the ravioli burst in the pot → The greens or cheese carried too much water. Next batch, squeeze the greens harder and drain the ricotta longer. For the current batch, fold in a spoonful of fine breadcrumbs or extra grated hard cheese to firm it, and chill it thoroughly before shaping.
Problem: The filling tastes bland even though it seemed seasoned → The dough dilutes seasoning more than cooks expect, and chilling mutes it further. Season the filling a touch more boldly than tastes right in the bowl, and always cook and taste one test piece before shaping the batch.
Problem: Greens turned into a dark puree instead of a fine chop → The pulses ran too long or the load was too big. Work in smaller loads, pulse in ones and twos, and stop the moment the cut looks even. A pureed batch can still be used, folded into a smooth filling style rather than a textured one.
A Short Taxonomy of Fillings and the Machines They Want
Cheese fillings, ricotta above all, want gentleness: brief pulses, small bowls, no sustained running. They are the natural territory of the 4-cup minis in this guide. Greens fillings want control: pulse discipline and dry ingredients, which is why the named pulse control of the KitchenAid earns its place. Meat fillings want a decisive blade and cold ingredients, the mince-and-grind territory of the BLACK+DECKER and the big Hamilton Beach. Vegetable puree fillings, squash and mushroom above all, want circulation and a clean pour, the Elemental’s BladeLock strength.
Many beloved fillings are hybrids: spinach and ricotta, meat and greens, squash and amaretti-style crumbs. Build hybrids in stages, processing each component to its own right texture and combining them with the briefest final pulses. The processor’s gift is not speed alone; it is the ability to give each ingredient its own treatment before they meet, which is exactly how restaurant fillings achieve their layered flavor in a single bite.
Filling as a Weekly Habit, Not a Holiday Event
The minis in this guide point to a different pasta culture than the holiday marathon: filled pasta as a weeknight possibility. A single batch of filling, a sheet of fresh or good-quality fresh store-bought pasta, and forty minutes produce tortelloni or ravioli for two to four with no special occasion required. The processor collapses the filling step, historically the fussy one, into five minutes and one small bowl to wash.
That habit changes what fillings you attempt. Small quantities invite experiment: a lemon and herb ricotta, a leftover roast chicken filling, a mushroom and walnut batch for a vegetarian guest. Failed experiments cost a cup of ingredients, not a day. Cooks building a broader repertoire around the machine will find the same small-batch logic in Best Food Processors For Riced Veggies, where modest loads and pulse control decide the result in the same way.
Regional Fillings, One Bowl: From Tortelloni to Agnolotti
Italy’s filled pastas argue with each other about everything except the processor’s usefulness. Tortelloni in the Romagna style lean on ricotta, herbs and lemon, and want the gentlest folding in this guide. Agnolotti del plin from Piedmont carry a roasted meat and vegetable filling that wants a decisive mince and patience with cold ingredients. Cappelletti split the difference with a rich meat and cheese mixture. A single mid-size or mini processor, used in the staged way this guide describes, can produce all three faithfully, because the stages, dry base, greens, main ingredient, brief final fold, are the same; only the ingredients change costumes.
The same bowl travels further than Italy. The spiced, finely minced fillings of many dumpling traditions reward the identical disciplines: cold ingredients, even mince, bold seasoning, thorough chilling. Cooks who fill both pasta and dumplings in the same month will find the processor habits transfer completely, down to the test piece, since a single boiled dumpling judges a filling exactly as a single raviolo does. That transferability is the quiet argument for learning filling technique properly once, rather than relearning it dish by dish.
One regional habit worth stealing regardless of the filling: the Emilia-Romagna practice of making filling a day ahead when the calendar allows. Overnight refrigeration firms the mixture, marries the seasoning, and turns shaping day into pure assembly. The processor’s speed makes that schedule easy to keep, since the filling itself asks for fifteen minutes of work, most of it squeezing greens and washing one small bowl.
Common Buying Mistakes
Skipping the squeeze. Wet greens are the first cause of burst ravioli. Cook, squeeze in a towel until nearly dry, chop, and squeeze again if the chopped greens weep. No processor setting substitutes for the towel.
Processing ricotta like a puree. Sustained running makes cheese fillings dense and weepy. Pulse briefly, scrape once, and stop as soon as the mixture is uniform. Lightness is a processing decision.
Shaping with warm filling. Warm filling is loose, hard to portion and hard on dough. Chill every filling before shaping, and keep it cold while you work. The refrigerator is a filling tool.
Under-seasoning out of caution. Dough dilutes every bite. Season boldly, then verify with a single cooked test piece before shaping the batch, while adjustment is still easy.
Using a bowl far bigger than the batch. A two-cup filling in a 14-cup bowl chops unevenly and coats the walls. Match the machine to the quantity, which in this guide usually means thinking smaller than instinct suggests.
Final Recommendation
For the way most filling is actually made, the Cuisinart Core Custom 4-Cup Mini is this guide’s first recommendation: the right size for a standard ricotta batch, an auto-reversing blade that folds seasoning evenly, and dishwasher-safe cleanup. It is the machine a weeknight pasta cook will reach for without thinking.
Start with the Cuisinart Mini Food Processor 3-Cup if it matches your kitchen, or the Hamilton Beach 10-Cup Food Processor as the closest alternative — check the latest price on Amazon for either before you decide.
Choose the KitchenAid 3.5 Cup if greens fillings dominate and pulse control is your priority, the Elemental if your fillings run soft and pourable, and the little Cuisinart Mini if your batches are smallest. Step up to the BLACK+DECKER 8-Cup for meat fillings at scale, and to the Hamilton Beach 10-Cup when the whole family is coming and the filling must be one large, consistent batch. In every case, dry greens, gentle pulses and a proper chill will do more for your ravioli than any upgrade.
One last encouragement: filling is the most forgiving place in pasta making to develop judgment, because every batch teaches something cheaply and the test piece never lies. Keep notes on the batches your table loved, including which machine and how many pulses, and within a season you will have a personal filling repertoire that no recipe collection can give you.
Frequently Asked Questions
Do I need a food processor with discs for pasta filling?
No. Filling is blade work: chopping greens, mincing meat, folding cheese. Discs serve slicing and shredding jobs elsewhere in the kitchen, which is why this guide’s picks are all blade machines judged on blade behavior, bowl size and control.
How fine should spinach be chopped for filling?
Fine and even, but not pureed. The pieces should disappear into the cheese base while the mixture stays dry and distinct. Pulse in short bursts and stop the moment the cut looks uniform; the next stage, juice appearing, is the sign you have gone one pulse too far.
Can these machines make pasta dough as well as filling?
These picks are chosen for filling, and the minis in particular are not dough machines. Dough wants a larger bowl and a drivetrain specced for kneading, as discussed in the wider guides. Treat this roundup as the filling half of the pasta toolkit.
Why does my filling make the dough soggy?
Almost always water: un-squeezed greens, undrained ricotta or wet mozzarella. Drain and squeeze each component before processing, chill the finished filling, and keep shaped pasta on a semolina-dusted tray so the base stays dry until cooking.
How much filling does a batch of ravioli need?
As a working guide, roughly a teaspoon per standard raviolo, and a home batch of pasta for four usually calls for two to three cups of filling. That quantity is exactly why the 3.5 and 4-cup machines in this guide are sized the way they are. When planning a bigger session, the batch logic in Best Food Processors For Potatoes for feeding a crowd with gratins follows the same honest sizing principle.
Can I freeze leftover filling?
Yes. Fillings freeze well in a sealed container or piping bag for a few weeks. Thaw in the refrigerator, check the texture and seasoning after thawing, and drain any liquid that has separated before shaping. Cheese fillings may need a brief stir to come back together.
How far ahead can I make pasta filling?
A day ahead is ideal for most fillings: the mixture firms, the seasoning settles, and shaping becomes calmer. Keep it tightly covered and refrigerated, and give meat fillings the same one-day limit you would give any fresh minced mixture. Fillings also freeze well if plans change.