To declutter kitchen tools, empty one area at a time, sort items by how often you use them, and keep only what earns its space. Set aside a couple of hours and work in small zones. The steps below make the job manageable and the result easy to maintain.
Prepare Your Workspace
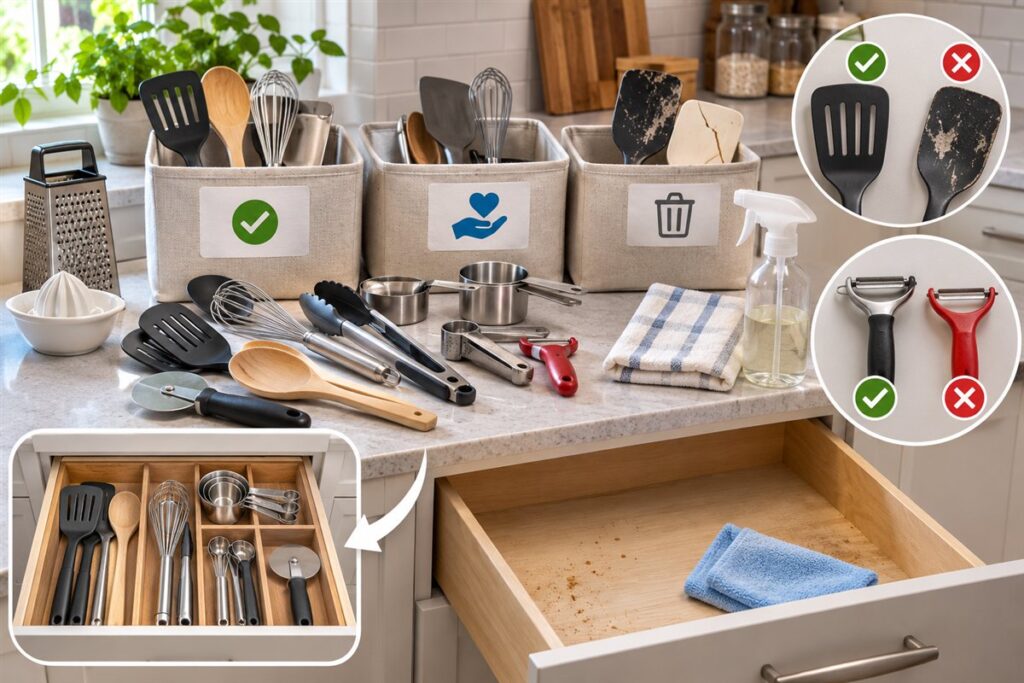
Clear a counter or table and gather three boxes or bags labeled keep, donate, and discard. Have a cloth and cleaner ready, because drawers often need a wipe once they are empty.
The Sorting Steps
- Choose one zone. Begin with a single drawer or cabinet so you do not feel overwhelmed.
- Empty it completely. Put everything on the counter and wipe the empty space.
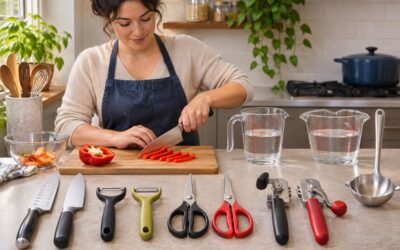
- Group like items. Put all spatulas together, all peelers together, and so on. Duplicates will show quickly.
- Ask three questions. Have I used this in the past year? Does it work well? Is there something I like better?
- Sort into boxes. Keep the best of each type, donate usable extras, and discard damaged pieces.
- Return items with a plan. Place frequently used tools nearest the stove and prep area.
Guidelines for Tough Decisions
| Situation | Suggested action |
|---|---|
| Three of the same tool | Keep the best one or two |
| Single-use gadget, unused for a year | Donate it |
| Cracked or melted plastic | Discard it |
| Dull or damaged knife | Have it sharpened or replace it, and wrap it carefully before disposal |
| Sentimental item | Keep a few, store them away from daily tools |
Keep It From Coming Back
- Follow a one-in, one-out habit for new tools.
- Give each category a set space, such as one drawer for utensils.
- Do a quick check every season.
- Before buying a gadget, ask whether an existing tool can do the job.
When discarding sharp items, wrap them well and label the package so waste workers are not hurt. Follow local rules for disposal and recycling.
Cleaning While You Sort
An empty drawer is a perfect time for a good wipe. Remove crumbs, check for spills, and let the surface dry before refilling. Wash anything that looks grimy, and look over wooden items for cracks or rough spots. If a wooden spoon or board is splintered, replace it. Taking a few extra minutes now keeps the space fresher and makes the next sort go faster.
Deciding What Counts as Clutter
Clutter is not simply having a lot of tools. It is owning things that get in the way of the cooking you actually do. A large collection that is organized and used regularly is not clutter, while a handful of unused gadgets crammed into a drawer can be. A useful way to decide is to look at your real habits rather than your intentions. Think about the last month of meals and which tools came out for them. Tools that never appeared are candidates for removal, even if they seem handy in theory.
It helps to separate three kinds of items. The first are workhorses: the knife, spatula, spoons and pans you reach for most days. The second are occasional tools that serve a specific, repeated purpose, such as a rolling pin used for holiday baking or a roasting pan used for big meals. These deserve space, but not prime space. The third are aspirational purchases, bought for a style of cooking you hoped to take up but never did.
Be honest about the third group without guilt. A tool you have not used is not a failure, just a bad fit. Some cooks find it easier to ask whether they would buy the item again today at the same effort. If the answer is no, it is probably time to pass it on or let it go.
The Zone-by-Zone Order of Attack
The order in which you tackle the kitchen can make the project easier. Start with an area that is small and low stakes, such as the junk drawer or the gadget drawer, so you build momentum before facing larger spaces. Save the heavily used areas near the stove for later, when your decision-making has warmed up and you have a clearer idea of what you value.
A sensible sequence for many kitchens looks like this:
- Gadget and utensil drawers: they fill with duplicates and are fast to sort.
- Counter items: decide what truly needs to live out, and move the rest into cabinets.
- Cabinets for bakeware and pots: check for warped, scratched or mismatched pieces.
- Knife storage: confirm every blade is safe and stored with its edge protected.
- High shelves and deep corners: items stored out of reach are often forgotten and can usually go.
Set a time limit for each session so the work does not drag on. Finish one zone completely before moving to the next, including returning the keepers and removing the donate box from the room. Half-done projects create more mess than none at all, and carrying boxes out the same day keeps you from reconsidering every item.
Deciding Which Duplicates to Keep
Duplicates are the biggest source of clutter, and they are also the easiest to resolve with a clear rule. Compare similar items side by side and keep the one that feels best in your hand, works most reliably and is easiest to clean. Weigh comfort, balance and sturdiness over appearance. If two items perform equally well, keep the one that fits your storage better.
Some duplicates are worth keeping because they serve different needs. Two cutting boards, for example, let you separate raw meat from produce. Two sizes of mixing bowl, saucepan or sheet pan are rarely redundant. A second whisk may be useful if you often cook two dishes at once. The question to ask is whether each copy does a different job or whether it merely sits behind the first.
- Keep extras of tools that get used and washed in a single meal, such as measuring spoons.
- Pass on third and fourth copies of anything that is rarely used.
- Keep a small number of spares for guests, but store them out of the daily zone.
When two tools are close in quality, test them in a real task before deciding. A short trial at the stove often settles the question faster than thinking about it.
Giving Tools a Second Life Responsibly
Once you have sorted items, what happens to the donate pile matters. Clean everything first, since nobody wants a grimy spatula. Check each item for completeness, such as lids that match, parts that fit and moving pieces that still work. Items with missing parts or visible damage are better recycled or discarded than passed on.
Think about who might use the items. Local charity shops, community kitchens, school or club groups, and neighbors can all be options, but each has its own rules about what they accept, so ask before you arrive. Some places do not take used cookware with worn coatings, sharp tools or small electrical appliances, so check in advance. Do not leave bags at closed locations.
For items that cannot be donated, look into local recycling rules for metals and plastics, since many pieces are made of mixed materials that need to be sorted. Broken glass and ceramics usually need careful wrapping. Take sharp or damaged knives to a place that accepts them, or wrap them thoroughly and label the package.
Finally, keep a short list of what you gave away. If you find yourself missing something in the next few months, you will know what you need to replace. This also makes it easier to resist buying replacements out of habit.
Making the New Layout Work for Daily Cooking
A clear-out only pays off if the space that remains works well. After you finish sorting, look at where each remaining tool sits and ask whether it matches how you cook. Place items by the task they serve, not by type alone. Tools for stirring and flipping belong near the stove. Peelers, graters and measuring tools belong near the prep area. Baking tools can live together in a separate spot.
Use the best-reach zones for the items you use most. These are the spaces between shoulder and knee height, close to where you stand. Put heavy or awkward items lower and light, rare items higher. Leave a bit of empty space in each drawer or shelf so you can put things back without a struggle. A drawer packed to the brim invites mess, while one with a little breathing room stays orderly.
- Test the layout over a week of real cooking and note anything that feels awkward.
- Move items that you keep fetching from far away.
- Label shelves or bins if others share the kitchen, so everything finds its way home.
Expect to adjust. The first arrangement is rarely perfect, and a small tweak after a week often makes a large difference.
FAQ
How many spatulas or spoons do I need?
Most cooks do well with two or three of each common type. Count what you use in a typical week and keep a little extra for guests.
Where can I donate usable tools?
Local charity shops, community groups, and neighbors often welcome clean, working items. Call ahead to learn what they accept.
How do I know whether a tool is clutter or just rarely used?
Ask whether it does a job nothing else can do and whether you would replace it if it broke. A rarely used tool that fills a real need can stay, while one that duplicates another is clutter.
What should I do with gadgets that were gifts?
A gift has done its job once it was given. If it does not suit your cooking, you can pass it on without guilt, or keep one or two with real meaning in a separate spot.
Should I declutter the whole kitchen in one day?
It is usually easier to work one zone at a time. Short sessions keep decisions sharp and prevent a half-sorted kitchen from taking over the room.
How do I handle tools I might need someday?
Set a time limit, such as a season or a year, and place them in a labeled box. If you do not open it by then, it is likely safe to donate the contents.
Is it worth replacing worn tools right away?
Replace tools that are unsafe or no longer work well, such as melted spatulas or loose handles. For others, wait until you notice a real gap.
How can I stop clutter from building up again?
Use a one-in, one-out rule, give each category a fixed space, and check the kitchen briefly each season. Asking whether an existing tool can do the job before buying also helps.
The Short Version
Work one zone at a time, group like items, and keep only the best of each type. Use simple rules to keep clutter away, and dispose of sharp or damaged items with care.