Kitchen utensils are easiest to manage when you keep the daily ones within arm’s reach of the stove and store the rest in a drawer by type. A crock for the favorites and a divided drawer for everything else is a simple, flexible system. Here is how to set it up.
Decide What Deserves Easy Access
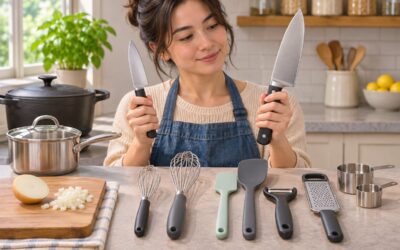
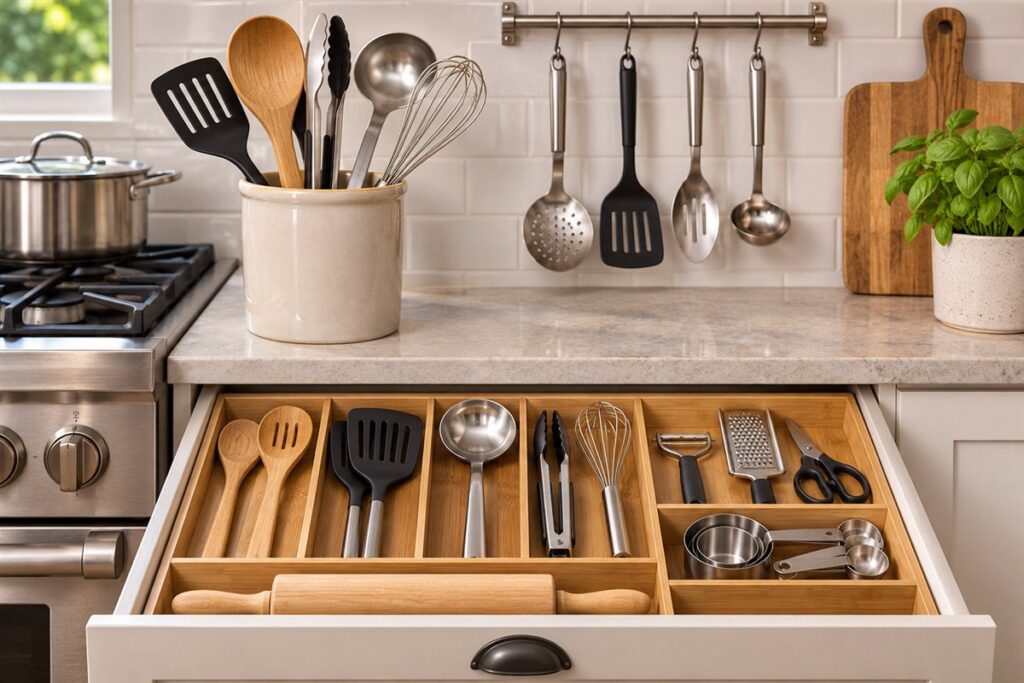
Watch what your hands reach for during a week of cooking. Most people use a short list again and again: a spatula, a wooden spoon, tongs, a ladle, and a whisk. These belong in a crock or on a rail near the stove. Everything else can go in a drawer.
Setting Up the Drawer
- Empty the drawer and wipe it clean.
- Measure the width and depth so a divider fits well.
- Group utensils by function: stirring, flipping, scooping, and cutting.
- Lay long items, like rolling pins or ladles, in a separate long section.
- Put frequently used groups at the front and small gadgets at the back.
- Close the drawer to test it. If tools jam, remove or rearrange pieces.
Crock or Drawer?
| Option | Strength | Drawback |
|---|---|---|
| Crock on counter | Quick access | Uses counter space and collects dust |
| Wall rail with hooks | Frees counter and drawer room | Needs wall space |
| Divided drawer | Hides clutter | Tools can get buried |
| Drawer with tray inserts | Keeps types apart | Fixed layout |
Handling Materials
Different materials need different care. Follow the maker’s guide for each item.
- Wooden tools should dry fully before storage and may need occasional oiling.
- Silicone and nylon tools are heat resistant to a point, so check the stated limit before using them in hot pans.
- Metal tools can scratch coated cookware, so keep them separate from nonstick pans.
Trim the Collection
Duplicates multiply fast. Keep two or three of the tools you use daily and donate extras. Discard cracked wooden spoons, melted spatulas, and anything with a loose head. Sorting once or twice a year keeps drawers workable.
Keep Daily Order
Return each tool to its place when you wash it, and wipe the drawer if crumbs build up. If a drawer is too full to close easily, remove the tools you rarely use. A small, tidy set that you can find without looking is better than a large pile where everything tangles.
Choosing Drawer Dividers and Trays
A good divider turns a jumbled drawer into a usable one, but a poor fit can make things worse. Start by measuring the inside width, depth and height of the drawer, and note anything that might interfere, such as rails or a lip near the front. Dividers come in several types: fixed trays with set compartments, expandable trays that adjust to fit, and individual bins that you arrange yourself. Adjustable trays suit drawers that are an unusual size, while fixed ones are neat for standard drawers.
Material and finish matter. Bamboo and wood look attractive and sit steady, but need to be kept dry. Plastic is light and easy to wipe, and some versions have a nonslip base. Metal trays are sturdy but can be noisy and may scratch. Rubber or textured liners help keep tools from sliding when the drawer opens and closes.
- Check the tray height so it does not stop the drawer from closing.
- Consider compartments wide enough for your bulkiest tools, like a ladle.
- Choose a layout that includes a long section for rolling pins or whisks.
Test the fit before committing to a large set. Lay your tools in the tray and open and close the drawer. If anything catches, adjust the layout or choose a different size. Keep the return policy in mind when ordering.
Crocks, Rails and Wall Storage Compared
When a drawer is full, going vertical is an option. A crock or utensil holder keeps favorites within reach, a wall rail with hooks frees counters and drawers, and a magnetic strip holds metal tools. Each approach suits different kitchens. A crock is simple, needs no installation and can be moved, but it takes counter space and needs to be heavy or wide enough not to tip when loaded with tools. Ceramic and stainless crocks are stable, while light plastic ones may need a weighted base.
Rails are good for small kitchens, because they use wall space. The rail and hooks must be mounted securely into studs or with appropriate anchors for the wall type, so check the installation instructions, and do not overload them. Place rails away from the burners so tools do not heat up and splashes do not reach them. Hang heavy tools low and light tools higher.
- Choose a crock tall enough to support long handles.
- Use S-hooks or adjustable hooks to fit different tools.
- Wipe wall-hung tools regularly, since they gather grease and dust.
Open storage looks appealing but needs more upkeep. If you cook often, tools stay clean from use. If you cook less, a closed drawer may keep them cleaner.
Sorting by Task and Cooking Flow
The best arrangement follows how you move while cooking. Instead of sorting purely by tool type, think in terms of tasks. At the stove, you need stirring, flipping and serving tools. At the prep area, you need peelers, graters, measuring tools and a bench scraper. Near the oven, you want mitts, tongs and a spatula for baking sheets. For baking, whisks, spatulas and rolling pins can live together.
Walk through a typical meal in your head, and notice what you grab and from where. If you keep crossing the kitchen for a spoon, move it closer. If the same tool appears in several places, a duplicate in each zone may make sense. Keep items that are always used together, like a ladle and slotted spoon, side by side.
- Stove zone: spoons, spatulas, tongs, ladle.
- Prep zone: peeler, grater, scissors, measuring tools.
- Baking zone: whisk, scraper, rolling pin, pastry brush.
- Serving zone: serving spoons and carving tools.
This approach also helps others in the household, as the logic of each zone is easy to learn. Label drawer fronts with small tags if you share the kitchen with several people.
Protecting Knives and Sharp Tools in the Mix
Sharp tools need special thought because they can injure you and damage other tools. Loose knives in a utensil drawer are hazardous when you reach in without looking, and they dull from bumping against metal. Use a knife block, an in-drawer knife tray with slots, a magnetic strip or individual blade guards. Pick the option that fits your space and habits, and follow the maker’s guidance on care.
Also consider peelers, graters, scissors, zesters and mandolines. They have exposed edges and deserve their own compartments or covers. Store a grater with the cutting surface facing away from your hand as you reach, and keep mandoline blades covered. Keep sharp tools out of reach of small children, using drawer locks if needed.
- Do not store knives with the edge touching other items.
- Dry knives before putting them away to protect the blade and handle.
- Check that magnetic strips are mounted securely and hold the weight.
If you have limited space, a slim in-drawer organizer for knives is a good compromise. Whatever method you choose, make it a habit to return each blade to its spot after washing. A predictable place for every sharp tool prevents accidents.
Keeping the System in Shape Over Time
An organizing system only works if it is easy to maintain. If putting a tool away takes effort, it will end up on the counter. Choose storage that is fast to use, even when you are tired. Open crocks and wide drawer sections are quicker than lidded boxes or narrow slots. If a spot is awkward, change it instead of trying to change your habits.
Set a regular time to reset. A quick tidy while the kettle boils or food simmers keeps things from drifting. Once or twice a year, empty the drawer, wipe it and check each tool. Discard anything that is cracked, melted, rusted or loose. Wooden items should be dry and free of splinters, and plastic tools should be free of melted edges or deep stains.
- Keep a small bin for items that need repair or replacement.
- Clean crocks and trays when you wash dishes.
- Reassess when your cooking habits change.
Watch for creeping growth. When a drawer starts to feel crowded again, ask which tools you have not used lately. The best system is flexible and can adjust as your needs change, whether that is a new baking hobby or a smaller household.
FAQ
How many utensils do I need?
That depends on how you cook, but most home cooks do well with about a dozen core tools. Count what you actually touch in a week and keep a few spares.
Should I keep utensils near the stove?
Keep the ones used at the stove nearby, but away from direct heat. A crock too close to a burner can warm up or melt plastic tools.
How do I fit a divider in an oddly sized drawer?
Measure carefully and look for an adjustable or expandable tray. Cut-to-fit options also exist, and a small gap around the edge can be filled with a liner.
Is a magnetic strip safe for utensils?
It works for metal tools when mounted securely. Check the weight limit and keep it out of reach of small children.
Should I store wooden spoons in a crock?
Yes, once fully dry. Keep them away from heat and moisture, and discard any that crack or splinter.
How do I keep a crock from tipping?
Choose a heavy, wide-based crock, put heavier tools in the center, and avoid loading it with too many long-handled tools.
What is the best way to store a whisk?
Store whisks in a crock with the head up or lay them flat in a long drawer section. Make sure they are dry before storing.
How often should I reorganize?
A quick tidy weekly and a deeper review once or twice a year is enough for most kitchens.
Can I use cutlery trays for kitchen utensils?
Yes, for small tools like peelers and measuring spoons. Larger items may need a deeper tray.
The Short Version
Keep daily tools in a crock or on a rail near the stove, and sort the rest in a divided drawer by function. Trim duplicates, check materials against the maker’s care guidance, and keep tools away from direct heat.