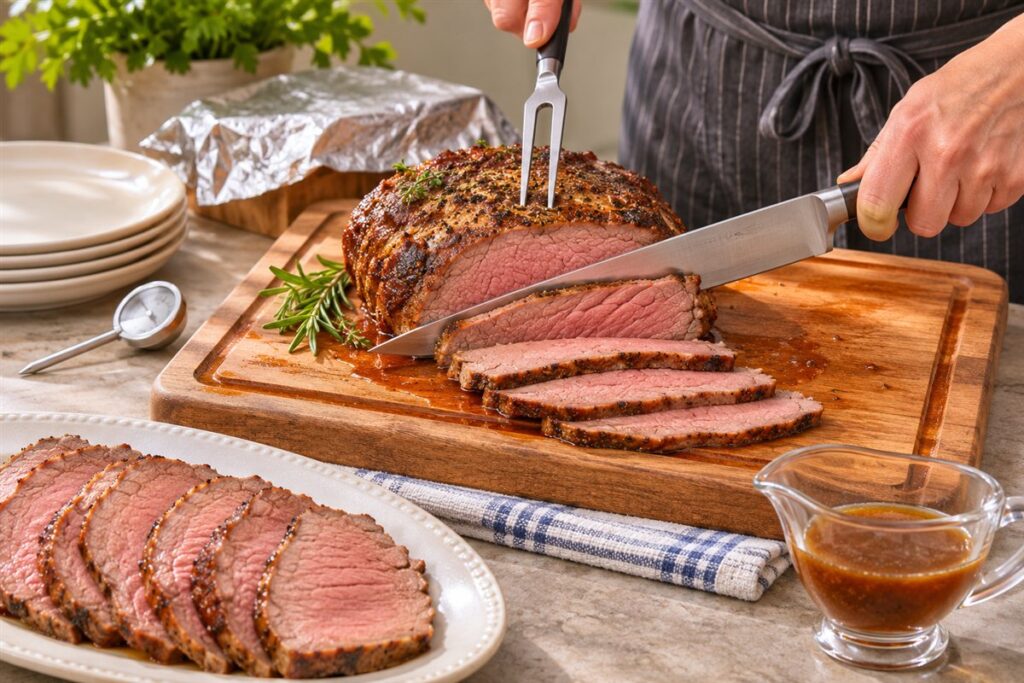
To slice cooked meat neatly, rest it first, steady it on a board and cut across the grain with long, smooth strokes of a carving knife. Resting lets the juices settle, so slices hold together. A steady grip and a sharp blade do most of the work.
Prepare the Board and Meat
Use a large board with a groove to catch juices, or place a damp towel under a flat board to hold it still. Let the roast rest on the board after cooking, loosely covered, for a short time as your recipe suggests. Check doneness with a thermometer and food-safety guidance before carving.
- Choose a long, narrow carving knife with a sharp edge.
- Pair it with a carving fork or a sturdy fork to hold the roast.
- Keep a warm plate nearby for finished slices.
Slicing a Roast Step by Step
- Look at the meat to find the direction of the grain, the lines of muscle fibers.
- Insert the fork firmly into the side, away from the path of the knife.
- Place the knife across the grain at one end of the roast.
- Use the whole length of the blade in a gentle forward and back motion, letting the knife do the cutting without pressing hard.
- Cut slices of even thickness, often about the width of a pencil to half an inch.
- Arrange slices on the plate, overlapping slightly.
- Pour any juices from the board over the meat or into your sauce.
Different Cuts, Different Approaches
| Meat | Carving note |
|---|---|
| Beef or pork roast | Slice across the grain in even rounds |
| Whole chicken or turkey | Remove legs and wings first, then slice the breast |
| Ham on the bone | Cut along the bone, then slice the freed pieces |
| Flat cuts such as flank | Slice thinly across the grain at a slight angle |
Safety and Care
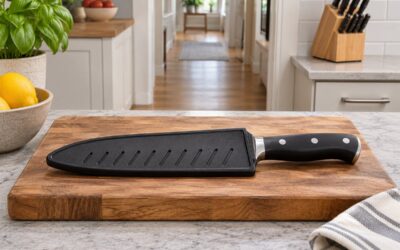
Always cut away from your body and keep your free hand behind the blade path. Wipe the handle and board if they become slippery. Follow the knife maker’s guidance on use, washing and storage. After carving, wash the knife by hand unless the maker says otherwise, dry it and store it with the edge protected.
Slice only what you plan to serve right away. Meat stays moister and warmer when the roast remains whole, and extra slices dry out as they sit. Store leftovers promptly, following food-safety guidance.
Carving Knife Features to Look For
A carving knife is built for long, even slices, and a few features separate a good one from a frustrating one. Length is the first. A long blade lets you cut a full slice in one pass, which gives smooth surfaces rather than ragged ones. Many carving knives are noticeably longer than a typical chef knife, but your comfort matters, so pick a length that fits your hand and your usual roasts. Check the product listing for blade length.
Width and flexibility matter too. A narrow blade slips between meat and bone and creates less drag, which suits poultry and ham. A slightly flexible blade follows curves, while a stiff one gives control through dense meat. Some carving knives have a pointed tip for working around joints, and others have a rounded tip. Choose according to what you cook.
- Straight edge: makes clean slices through roasts.
- Granton or hollow-ground edge: small indentations along the blade reduce sticking, according to makers, though results vary.
- Serrated edge: can help with crusty or slippery surfaces, but may tear tender meat.
The handle should feel secure with greasy hands. Look for texture or a shaped grip and a guard that keeps your fingers from sliding forward. A carving fork with a guard completes the set. Read the care instructions, and check whether the knife can go in the dishwasher.
Reading the Grain and Choosing Your Cutting Direction
The grain of meat is the direction in which muscle fibers run, and cutting across it makes each slice more tender. Look closely at the surface of the meat before you start. You will see fine lines running in one direction. Slicing across them shortens the fibers, so they are easier to chew. Slicing along the grain leaves long strands that can feel tough, even in a well-cooked piece.
Not all cuts have a single grain direction. Some roasts, like those with several muscles joined together, have fibers that change direction. In these cases, you may need to turn the meat as you slice to stay across the grain. If you cannot tell, cut a test slice and examine it. Flat cuts such as flank or skirt have very visible grain and benefit from thin slices at a slight angle.
- Cut a small corner first to check the grain direction.
- Rotate the roast when fibers change direction.
- Slice thinner when the meat is chewier.
Poultry is a slightly different case. The breast meat is cut across the grain after removing the whole breast from the bone, which gives wider, tidy slices. Dark meat is often pulled or cut off the bone in pieces rather than carved in slices. Take your time and look at the meat before you cut.
Setting Up a Carving Station at the Table or Counter
Carving is easier when the station is ready before the roast arrives. Choose a large, stable board with a juice groove, or place a rimmed tray under the board to catch drips. A damp towel or non-slip mat prevents sliding. Have a warm platter for finished slices, a small bowl for bones and trimmings, and a spoon for juices. Clear the area of anything unnecessary, and make sure the lighting is good.
Decide where you will carve. Carving in the kitchen is usually tidier and gives you more space, and then you bring the platter to the table. Carving at the table can be a nice presentation, but it needs a stable surface, extra space and caution around guests. If you carve at the table, keep children and pets clear.
- Set out serving utensils and plates before you begin.
- Keep paper towels nearby to wipe the handle and board.
- Place the board near the platter, to limit movement.
Consider the temperature of the plates and platter. Warmed plates keep slices from cooling too quickly, but be careful not to make them too hot to handle. Position the roast so the thickest part faces you, giving you the best angle for the first cut. A clear plan lets you carve calmly while guests wait.
Carving Poultry and Bone-In Roasts
Bone-in roasts need a slightly different approach than boneless ones. For whole poultry, start by removing the legs. Cut through the skin between the leg and the body, bend the leg out to find the joint, and cut through it. Separate the drumstick from the thigh at the joint. Remove the wings in the same way. For the breast, cut along one side of the breastbone and lift the whole breast away, then slice it across the grain.
For bone-in roasts such as a leg of lamb or a ham, steady the meat and cut slices down to the bone. Then run the knife along the bone to release the slices. Alternatively, cut large sections of meat off the bone first and slice them on the board. This second method gives you more control, especially if the meat is large or awkward.
- Use the tip of the knife to follow bones and joints, without forcing it.
- Keep bones for stock if they are not too burnt or heavily seasoned.
- If a joint resists, change the angle and feel for the gap.
Practice helps, and a modest chicken is a good place to start. Remember that joints are meeting points, not obstacles, so aim for the gap rather than cutting through bone. Always use a thermometer and follow food-safety guidance for doneness before carving.
Serving, Warming and Handling Leftovers
How you serve and store sliced meat affects its quality. Arrange slices on a warm platter and pour over some of the juices or serve sauce on the side. Serve soon after slicing so the meat stays warm and moist. If you need to hold it for a short time, cover loosely with foil, which keeps warmth without trapping steam that softens crust.
Leftovers should be refrigerated promptly. Follow food-safety guidance on how quickly to refrigerate and how long cooked meat keeps. Store in shallow, covered containers, and leave the meat in larger pieces if you can, since it stays moister that way. Slice it thinly when you want it for sandwiches or salads. Add a little of the juices or broth to the container to keep it moist.
- Reheat gently with a splash of broth or sauce, covered, to avoid drying.
- Use bones and trimmings for stock, soup or gravy.
- Freeze extra portions, labeled with the date.
Cutting only what you need and keeping the rest whole helps prevent dryness. After the meal, wash the knife and board promptly, and store the knife with a protected edge. Check the knife’s edge before the next big roast, and sharpen it if needed.
FAQ
Why cut across the grain?
Cutting across the fibers shortens them, which makes each bite easier to chew.
Can I use a chef knife instead?
Often yes, if it is long and sharp enough. A carving knife’s slimmer blade moves through large pieces with less drag.
How long should a carving knife be?
There is no single answer. Longer blades make smooth slices in one pass, but choose a length you can control comfortably.
Is an electric carving knife a good idea?
Some people like it for speed and uniform slices, though it needs an outlet and careful handling. Read the manual and decide based on how often you carve.
Why does my meat shred when I slice it?
The knife may be dull, or you may be pressing instead of letting the blade glide. The meat may also be too hot or not rested long enough.
How thick should slices be?
It depends on the meat and the dish. Many cooks cut roasts in slices of about a quarter to half an inch, and slice tougher cuts thinner.
Do I need a carving fork?
It helps steady the roast safely. Any sturdy fork with a guard will do if you do not have a dedicated one.
Can I carve ahead and reheat?
You can, but slices dry out faster than a whole roast. Reheat gently with some broth, and follow food-safety guidance.
What is the best way to hold the knife?
Use a firm, comfortable grip near the guard, with the guiding hand clear of the blade path. Let the knife glide with long strokes.
The Short Version
Rest the meat, steady it, and slice across the grain with long strokes. Use a sharp knife, cut away from yourself and follow the maker’s instructions for the knife.